Announcement

Collapse
No announcement yet.

Graphic Arts Tutorials, Textures, Resources Thread

Collapse
X
 
  • Filter
  • Time
  • Show
Clear All
new posts

    #46
    Originally posted by DJgirl View Post
    Woohoo, some new tutorials!!!! Gonna go try those out in a bit.
    I was looking at my tutorial and comparing it with the sinking ship I had already made. You can go further by erasing more pink with the eraser tool, play with the transparency/opacity or even adding a different color gradient as well.
    Last edited by kali1; 21 January 2009, 01:58 PM.

    Comment


      #47
      Originally posted by kali1 View Post
      I was looking at my tutorial and comparing it with the sinking ship I had already made. You can go further by erasing more more pink with the eraser tool, play with the transparency/opacity or even adding a different color gradient as well.
      Okay, cool. Thanks for the tip. I will try that, too.
      sigpic
      Sig made by me

      Comment


        #48
        Originally posted by kali1 View Post
        Great tutorial there girl!!! Well done!!!
        thank you

        Comment


          #49
          I missed your tut Fainne. very well explained.
          sigpic

          Comment


            #50
            Originally posted by Luciana View Post
            Tutorial from Luci.

            How to do that sig:


            Lee pace "the pie maker" and Anna Friel "a girl named chuck".

            Spoiler:


            PIC1 ; PIC2


            Open a new document 500 x 200.
            You can also use any size you want.

            I filled it with a pattern from far2far_away.
            You can use any pattern you want. But it should be simple, like plaid or stripes.


            PSP user just use my base. Created another one you can choose if you like.
            PS user can use them as well.

            Open pic 1 and put in onto the base. Not exactly in the middle...something like that:


            I erase a part of the right side to see more of the pattern.

            Merge layers.

            Coloring

            Spoiler:


            PSP
            Spoiler:

            Here's coloring by helloimkelsey @LJ

            And here's one by everyline @LJ.


            It's a different coloring as I used for my Ned&Chuck sig...cause that one is easier and not that complicated.

            Copy base, set to screen 50%.

            New filllayer - solid color #FFFC00 soft light 70%.

            New adjusmestlayer -selective coloring:

            reds

            -100
            0
            +100
            +100

            yellows

            -7
            0
            -25
            0

            mangenta

            -100
            -55
            -11
            0

            neutrals

            +100
            -25
            -80
            +30

            OK

            Another selective coloring:

            reds:

            -100
            +71
            +64
            +34

            yellows

            0
            0
            -60
            0

            neutrals

            0
            0
            0
            +10

            black

            0
            0
            0
            +30

            OK.

            New adjustmentlayer - brightness/contrast: contrast +7

            New adjusmentlayer - hue/saturation: saturation +7

            Merge layers.


            Open pic 2. Desaturate it the way you prefer. Actually I prefer using black/white gradient maps, but it makes that pic just too dark.
            Resize it to about 265 x 400 and put in onto your document as well.

            Erase everything around them so that just Lee and Anna are left. Like this:


            Create a new layer underneath pic 2 and create a simple selection with the Polygon Lasso tool.


            Fill with white.


            Merge layers.

            Text and Effects

            Take that scratch texture, resize to 600 x 450 and put in on top of everything and set to color dodge.
            Erase everything from the faces and what looks bit disturbing.


            I wrote the names in commercial script 24pt and chose a color from the piece.
            Added a white rectangle behind the text to make it more visible.

            Merge layers.

            Put that light texture on top and set to lighten. I erased some of the parts on the right side.

            Edit > stroke > 3px white.
            Same again > 1px black.

            (I added a black/white gradient set to exclusion 15%.
            Still don't know if or how that works in psp. )

            Filter > artistic > paint daubs; set both settings to 1

            And finished.


            Tried to keep it as simple as possible.

            Great tutorial Luci!!!!

            Comment


              #51
              Thankies.
              sigpic

              Comment


                #52
                you are welcome!! Great resources you posted too. I love looking at that stuff....could do it all day if I could

                Comment


                  #53
                  Originally posted by kali1
                  Okkkkk...

                  I've played around some more with the light on that pic with John so he didn't look so dark. That pic is dark anyway so maybe that wasn't a great pic to use but by making John lighter, it ended up making Elizabeth lighter.....


                  Better? Worse?
                  oh, that looks waay better..nicely done!
                  sigpic

                  Comment


                    #54
                    Originally posted by Luciana View Post
                    I missed your tut Fainne. very well explained.
                    thankies. I love your tutorial too. I just wish there were PSP pattersn too I'd also take textures but they don't look as good as the patterns...

                    Comment


                      #55
                      great to see some new tuts in here to try out - still have quite a few to catch up on though already
                      sigpic
                      Sig by me my LJ - the place to find some of my artwork and fics - My Stargate vids

                      Comment


                        #56
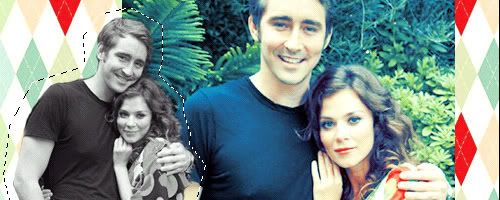
                        This thread is awesome !!!!!!!!!!!! and i already tried one... Thanks Luci ! i know that both are RDA and AT in RL not Sam and Jack but i had nothing to write in the moment... =

                        sigpic

                        Comment


                          #57
                          Heeey! I'm joining this thread, despite the fact that I have a program no-one else has and therefore can't utilise any of the tuts, or make any myself... Ah well!
                          ~Thanks to Achaja for my lovely birthday presents!!~

                          Comment


                            #58
                            that's great Rachel!!!

                            Comment


                              #59
                              Originally posted by LiliJ View Post
                              Heeey! I'm joining this thread, despite the fact that I have a program no-one else has and therefore can't utilise any of the tuts, or make any myself... Ah well!
                              eeeexcuse me? I have PSP too

                              Comment


                                #60
                                Yeah, but you have a good version. I have PSP 7 *sulk* I dunno, your tuts might work on mine, though!
                                ~Thanks to Achaja for my lovely birthday presents!!~

                                Comment

                                Working...
                                X