Announcement

Collapse
No announcement yet.

Artwork for All - challenges, graphics, tutorials

Collapse
X
 
  • Filter
  • Time
  • Show
Clear All
new posts

    Thanks, JW.

    FG, it's NYC and Renner! I love it!

    Comment


      Originally posted by ladygris View Post
      Thanks, JW.

      FG, it's NYC and Renner! I love it!
      Thank YOU, girls. It would be such a shame not to use it. Indeed, NY and Renner: it's always a winner combo.
      sigpic
      Beautiful signature and avatar by Yamiinsane. You're a mind reader!
      Aristides de Sousa Mendes

      Comment


        Originally posted by ladygris View Post
        Love it! Great job!!! Can't go wrong with Renner.

        Originally posted by JadedWraith View Post
        The understatement of the year...Sometimes it's acessible, sometimes it's not. Some features are activated, and then there are not. What a bipolar site!!!!
        Wow, I haven't really encountered those problems yet. The only glitch I hit was when I was using the new editor (really miss the old one - it had more features, which I miss) and it wouldn't load the pic into the editor so that I can edit the pic. This only happened once. Also, I am having trouble copying the links for my pics. I'm having to click the link multiple times for it to be highlighted (in blue) so that I can then right click on it and "copy" it. Such a pain!

        ( I have friends who are bipolar and they aren't that inconsistant...Funny enough, very creative people )
        I believe that!

        Yeah, toile de Jouy. I love those patterns and THAT is adorable!!!!! Can't green you now
        I used to hate toile when I was younger but now I love it! And, thank you! Don't worry about the green, it's the thought that counts.

        Squeeeee! The shirt matches his eyes I love it ! You're in the same boat as RiG. I have to green a couple of people before but you, RiG and Xchemist are on my list, definetely.
        I'm on your list.

        Two of my favorites...NYC and RENNER! Love it!
        sigpic
        Sig by ME.

        Comment


          My try at understated textures and images....

          Fics | Art | Tumblr

          Comment


            Lovely arties, entries and otherwise.
            sigpic

            Comment


              *waves*

              Hi everyone! I'm back from my trip - had an amazing time! Looking forward to catching up with the pretties here, looks like the art has been flowing while I've been gone And looks like I'm collecting this week too - excellent
              sigpic
              Artwork for All | Sig & avi by JadedWraith

              Comment


                Originally posted by josiane View Post
                *waves*

                Hi everyone! I'm back from my trip - had an amazing time! Looking forward to catching up with the pretties here, looks like the art has been flowing while I've been gone And looks like I'm collecting this week too - excellent
                Good to see you as well.

                Completely stuck on a wallie. I just can't get it to work
                sigpic
                Beautiful signature and avatar by Yamiinsane. You're a mind reader!
                Aristides de Sousa Mendes

                Comment


                  Sorry to hear that JW.

                  Originally posted by Ikorni View Post
                  My try at understated textures and images....

                  http://i1241.photobucket.com/albums/...psc466ad77.jpg
                  Love it! Beautiful work!

                  Originally posted by josiane View Post
                  *waves*

                  Hi everyone! I'm back from my trip - had an amazing time! Looking forward to catching up with the pretties here, looks like the art has been flowing while I've been gone And looks like I'm collecting this week too - excellent
                  *waves* Welcome back! And thanks for the heads up on you being the one collecting. I was gonna ask (really, I was gonna search for the challenge post).
                  sigpic
                  Sig by ME.

                  Comment


                    Originally posted by RodneyIsGodney View Post
                    Sorry to hear that JW.
                    Don't be. Wallies are my Achilles heel. I'm just grumpy.

                    Originally posted by RodneyIsGodney View Post
                    Love it! Beautiful work!


                    *waves* Welcome back! And thanks for the heads up on you being the one collecting. I was gonna ask (really, I was gonna search for the challenge post).
                    So I was I. I always have to recheck...
                    sigpic
                    Beautiful signature and avatar by Yamiinsane. You're a mind reader!
                    Aristides de Sousa Mendes

                    Comment


                      Welcome back, josi!

                      Okay, so I think it was Jumble who asked for this tut, and then I tacked a second one on the end of it.

                      To make this in PS CS2:


                      Be warned! There are a lot of stocks/textures in this first one!

                      Spoiler:
                      You will need:


                      Jeremy:

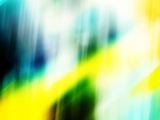
                      Open your canvas to the size you want. Add the first texture, the blue and yellow. Scale if necessary until the only yellow showing is the lower right corner.

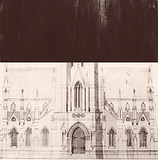
                      Open the second stock, the church. Set to Multiply, opacity 100%. Using Gaussian Blur (Filters-->Blur-->Gaussian Blur), blur it out a touch. Just enough that it's not super-sharp lines. Place it slightly off-center.

                      Open the third stock, the flowers in the book. Set to Soft Light, opacity 100%. For this, I used only the flowers off to the left. Then, I duplicated it and set the flowers to the right, so it looked like the flowers were in front of the church. Erase any hard edges or overlap of the images.

                      Open the fourth image, the black and white texture. Set to Soft Light, opacity 100%. Position as desired.

                      Now, these next few steps are out of order.

                      Open the fifth image, the camera. Set to Soft Light, opacity 100%. Rotate slightly to the right and position on the right side of the canvas around the flowers. Duplicate the layer, desaturate it, and set to Soft Light as well. Erase only the lens portion of the camera and any hard edges to blend.

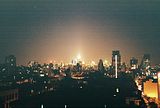
                      Now, open the sixth image, the NYC. Set to Lighten, opacity 100%. Move this layer below the two camera layers, then erase whatever you don't want focused in the lens of the camera.

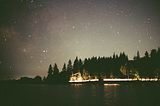
                      Open the seventh image, the starry night. Position so that the entire canvas is filled mostly with stars. Set to Soft Light, opacity 100%.

                      Now, make a stamp of the entire thing. (Ctrl—Alt—Shift—E)

                      Open your character image. Blend the background in as much as you want. For Jeremy here, I used a soft brush to erase away everything save what was around his body.

                      Now, take your stamp and move it above the image of Jeremy. Carefully erase away whatever covers him so that you can “reveal” him from underneath. (For me, this filled in the brightness around his face quite well.)

                      Now, open the eighth stock, the vase of flowers in the window, and flip horizontally. I can't remember if I scaled it up or not, but I set it to Hard Light, opacity 100%. I used just the very top of the image, with the window casing and curtain. Using a large soft brush on eraser, I blended the edge in on the right and erased what was covering Jeremy.

                      Open the ninth stock, the paisley-ish texture. Use Gaussian Blur on it like you did for the church Set to Multiply, opacity 100%. Position it so that you get vague hints of the “curls” around the camera. I erased what I didn't want but kept a lot of the coloring over Jeremy.

                      Open that image again and use Gaussian Blur to remove all but the color. Set to Linear Burn, opacity 34%. Position so the red “glow” is over the curtain to the left.

                      Open the tenth image, the red and gray texture. Set to Soft Light, opacity 100%. Flip horizontally and position the red over the curtain, bringing a rich red tone to the curtain.

                      Finally, open the eleventh texture and set to Normal, opacity 100%. I used this to add a soft glow around the edges by erasing most of it with a large soft brush. This highlighted a lot of the details of Jeremy's suit.

                      Whew!

                      COLORING
                      Spoiler:
                      Selective Coloring
                      Reds: 0, +7, +1, +100
                      Yellows: +100, +13, +15, -9
                      Greens: +100, +35, +2, -6
                      Neutrals: +27, +2, -13, +4
                      Blacks: +48, +6, +2, +100

                      Gradient Fill
                      #000000 to #ffffff
                      Set to Soft Light, opacity 50%.
                      Using the layer mask, paint black over the area on his suit to reveal more of the details.


                      And you're done. If you want to add text, I used Delicious Small Caps to add his name.


                      And, since JW mentioned it, here's a tut for this one, again for PS CS 2:


                      Spoiler:
                      You will need:

                      This one is fairly simple comparatively. It's mostly coloring.

                      Open your canvas to whatever size you want. Add the gorgeous picture of Jeremy and scale however. For the sig, I duplicated it and filled in the background. I didn't soften any of the edges because, frankly, the image lends itself to straight lines.

                      Make a stamp (Ctrl—Alt—Shift—E) and set to Soft Light, opacity 29%.

                      Make a new layer filled with color #414c6f. Using the rectangular marquee tool, crop out a thin segment. Move to the very bottom of the image.

                      Duplicate that thin segment and bucket fill with color #554639. Set it just above the blue one, so there's a double line of color along the bottom. (For the wallie, I duplicated both of these lines and rotated them by 90 degrees. Then, I used them to cover the right edge of the picture. See?)

                      COLORING
                      Spoiler:
                      There's a LOT of it! Each of these are separate adjustment or fill layers.

                      Selective Coloring
                      Reds: +29, +1, +20, +52
                      Cyans: +99, -100, -100, +100
                      Blues: +100, -100, -100, -10
                      Neutrals: +9, +1, +8, +6
                      Blacks: +10, +7, +14, +2

                      Gradient Map
                      #000000 to #ffffff
                      Set to Soft Light, opacity 29%, fill 60%.

                      Hue/Saturation
                      Saturation: +18
                      Set to Screen, opacity 17%.

                      Gradient Fill
                      #000000 to #ffffff
                      Set to Soft Light, opacity 46%. Using a large soft brush and a layer mask, paint black over the top and whatever part of Jeremy you don't want that dark.

                      Photo Filter
                      Sepia


                      Now, add the texture. Using a very light Gaussian Blur (Filters-->Blur-->Gaussian Blur), remove the “dotted” portion of the texture. I wanted the light part, but not the “dots.” Set to Soft Light, opacity 100%. If desired, use an eraser to erase over the colored lines at the bottom of the canvas.

                      Make a stamp and use Paint Daubs (Filters-->Artistic-->Paint Daubs) to sharpen it. I had a Brush Size and Sharpness of 1. Set this layer to Normal, 31% opacity.

                      I used Champagne & Limousines for the text in color #71a1a0.


                      And you're done! If you have any questions, don't hesitate to ask.

                      Comment


                        Yes, it was me lg - thank you

                        Comment


                          Y'welcome.

                          Comment


                            Originally posted by josiane View Post
                            *waves*

                            Hi everyone! I'm back from my trip - had an amazing time! Looking forward to catching up with the pretties here, looks like the art has been flowing while I've been gone And looks like I'm collecting this week too - excellent
                            Nice to see you again!

                            Originally posted by JadedWraith View Post
                            Good to see you as well.

                            Completely stuck on a wallie. I just can't get it to work
                            It'll come! Sometimes it helps to go away a bit and come back later.

                            Originally posted by RodneyIsGodney View Post
                            Sorry to hear that JW.

                            Love it! Beautiful work!

                            [/SIZE].
                            Thanks!
                            Fics | Art | Tumblr

                            Comment


                              Challenge entry

                              sigpic

                              Comment


                                Cool tuts and entries lg, Nola.
                                sigpic

                                Comment

                                Working...
                                X