Announcement

Collapse
No announcement yet.

Artwork for All - challenges, graphics, tutorials

Collapse
X
 
  • Filter
  • Time
  • Show
Clear All
new posts

    Originally posted by m&mnm317 View Post
    Josi - love your new Castle/Beckett set! So pretty
    Thanks! All the credit goes to LadyGalaxyJ, she made it for me for my birthday
    sigpic
    Artwork for All | Sig & avi by JadedWraith

    Comment


      Originally posted by josiane View Post
      Thanks! All the credit goes to LadyGalaxyJ, she made it for me for my birthday
      How nice!
      Spoiler:
      I'm so excited for that show to start again

      sigpic
      Coming January 2017

      Comment


        Originally posted by Jumble View Post
        Nice leather sigs RiG
        Thanks.

        Lookee what Estrela did with my wp.........


        Awesome!
        Very Awesome!

        Originally posted by Hyndara71 View Post
        RiG - yummy!
        Thank you. I think he is too.


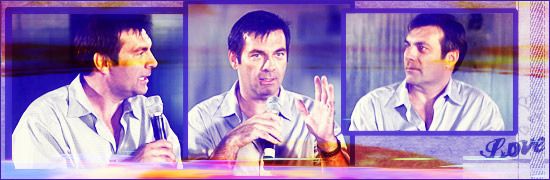
        I'm working on another one right now and then I'll make a third one, possibly a fourth one seeing as Dean has a new leather Jacket and Jensen as a cool leather jacket too.
        sigpic
        Sig by ME.

        Comment


          Gorgeous arts!

          Made these from Josi's tut, though I don't know which one I like better...

          sigpic
          Icon and Sig by me.

          Comment


            I like the first one best Yami - it seems sharper and more defined to me, and I think the larger pic of the Doctor makes for a bolder focus

            Comment


              Originally posted by Jumble View Post
              I like the first one best Yami - it seems sharper and more defined to me, and I think the larger pic of the Doctor makes for a bolder focus
              I agree with Jumble, though I do like the cropping on the triceratops' face in the second, very effective
              sigpic
              Artwork for All | Sig & avi by JadedWraith

              Comment


                Wow, now there are dinosauriers in Doctor Who? I really should watch the new episodes ...
                Great WPs, Yamii! Like them both (the second especially for the triceratops *little fangirlie squee*). But I'm with Jumble, the first one looks ... a bit better.

                Original eBook:Der Spuk im Rosenhaus
                Sig & Avi by Josi
                sigpic
                LJ, FanFic-Blog(the longest lasting German SG-fanfic series), Profile at ff.net, Profile at FF.de,Profile at deviantART (Sorry, fanfics mostly in German)
                I'm on Twitter and on Facebook Tumblr and AO3

                Comment


                  For tut week, from Yami's tut:


                  And just because:

                  sigpic
                  Artwork for All | Sig & avi by JadedWraith

                  Comment


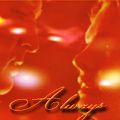
                    Oooh Josi! That second wp looks very 'Jumbly' Care to share a tut for it?

                    Best line from the new Dr Who?

                    Spoiler:
                    "The dinosaurs are driving the ship??"
                    "Don't be ridiculous!"

                    I enjoyed the ep, but I felt that the Doc was written a bit over the top ridiculous - he is supposed to be ultra intelligent, and they made him a bit stupid IMO

                    Comment


                      Thanks Jumble, Josi, and Hyn I was leaning towards that one too but I really couldn't make up my mind...

                      Josi: Those are gorgeous!
                      sigpic
                      Icon and Sig by me.

                      Comment


                        Josi, those are great! *stares*

                        Original eBook:Der Spuk im Rosenhaus
                        Sig & Avi by Josi
                        sigpic
                        LJ, FanFic-Blog(the longest lasting German SG-fanfic series), Profile at ff.net, Profile at FF.de,Profile at deviantART (Sorry, fanfics mostly in German)
                        I'm on Twitter and on Facebook Tumblr and AO3

                        Comment


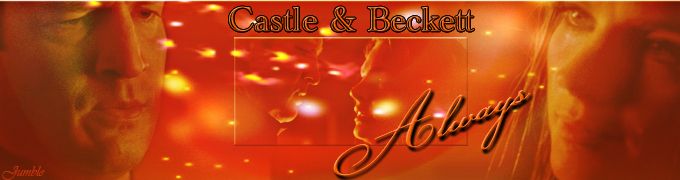
                          Pretty much too late for tut week but, as requested by Jumble, tut for this wallpaper:


                          Or at least, as best as I can reconstruct it. I fiddled a lot on the way to the final result with this one

                          Spoiler:

                          1. Open your canvas and fill (or leave filled) with white. Position the pictures of Castle & Beckett in the middle and use layer masks to blend them together and erase the backgrounds. You can be a bit rough with this because the textures will cover up a multitude of sins when you get to them! Desaturate them both.

                          2. The colour splashes behind them were a bit of a fiddle, so I hope this makes sense! I started in a new window with (believe it or not) the NBC peacock logo. I knew that this would give me the colours I wanted in roughly the right positions so it seemed easier to use that and mess around with it rather than do it from scratch manually. Anyway, in your new window, scale the logo down to about 100 pixels wide and then zoom right in until you can see the pixel grid (as I wanted this mosaic-y look). Use the motion blur (make sure you move the slider way down as you're zoomed in so much) to merge the colours in together. Take a screengrab of this zoomed-in view, and then paste that on your original canvas behind Castle & Beckett. Then use the scale and warp options from the edit > transform menu to make it fit nicely behind them.

                          3. Next, add this texture on a new layer and position at the bottom of the canvas, surrounding Castle & Beckett.


                          4. Now add this texture, desaturate and set to lighten, and position at the bottom, so that the paisley bit shows up over Castle. I think I upped the contrast to help bring it out too.


                          5. Duplicate that layer and invert it so that it's now black on white. Set this one to darken and position over the bottom of Beckett.

                          6. New adjustment layer > curves:
                          - Point 1: output 222, input 193
                          - Point 2: output 54, input 87 (or whatever you need to bring out the contrast nicely)

                          7. New adjustment layer > hue/saturation. Increase the saturation to +100, and the lightness to +25.

                          8. New adjustment layer > brightness/contrast. Reduce brightness to -32 and increase contrast to 57. All these steps are really about bringing the contrast and colours right up and brightening without losing definition.

                          9. Next add this texture, set to lighten and position.


                          10. Now a selective color layer, as follows:
                          - Reds: C 0, M +92, Y +29, B 0
                          - Blacks: C 0, M 0, Y -2, B +9

                          This just makes the reds and oranges more vibrant and yet again, beefs up the contrast (I love contrast!)

                          11. New layer, fill with #ebebeb and set to color burn (again to bring out the colours and contrast even more)

                          12. New adjustment layer > brightness/contrast. Up the brightness to 13 and the contrast to 20.

                          13. Make a stamp of the whole thing and use the motion blur on it, then set the layer to darken at 50%. Add a layer mask and erase the middle so that you get rid of the blurring over Castle & Beckett and the detail of your textures and the grid-marked colour splashes, but get a nice fading/smudging out effect to either side with the colours.

                          14. Next add this texture, set to darken. I wanted the detail part to the bottom left, but it's at the top right on the texture, so once I'd positioned it how I wanted it I duplicated the layer three times and moved these new three around so that the whole canvas was filled with the texture background.


                          15. New adjustment layer > curves:
                          - Point 1: output 181, input 166
                          - Point 2: output 69, input 82

                          16. Repeat step 11 and add yet another #ebebeb color burn layer.

                          17. Make a stamp of everything and sharpen it at this point.

                          18. Now add the text - font is Champagne & Limousines. It got a bit lost in amongst everything else so I duplicated the text layer to give it a bit more definition.

                          19. Next add this texture, set to screen, and position to the bottom left so that you get the effect of the colour and the light to the bottom left of Beckett.


                          20. And finally, add this texture, set to darken. Position to the bottom right of Castle and use a layer mask to erase most of it except for the flower. As with step 4, adjust the brightness/contrast a bit to make it show up better too.


                          And that's it. As you can see from all of that it really was one giant fiddle from start to finish until I got something I liked!
                          sigpic
                          Artwork for All | Sig & avi by JadedWraith

                          Comment


                            Banner by Sarai

                            Tutorial Week 13


                            Tut by Yamiinsane

                            ladygris


                            Josiane


                            Tut by Josiane

                            ladygris


                            Tut by Josiane

                            ladygris


                            yamiinsane


                            Jumble


                            Estrela


                            Tut by ladygris

                            yamiinsane


                            Tut by Rocket_Scientist

                            Jumble


                            Tut by Josiane

                            Jumble


                            Master list of all this week's tuts
                            sigpic
                            Artwork for All | Sig & avi by JadedWraith

                            Comment


                              Banner by Padme

                              Challenge 46

                              Textures


                              Make a piece of art using one or more of the following textures:


                              All from our texture challenge, made by Estrela, Madness Reigns, ladygris, Nolamom, Rocket_Scientist and ShaViva

                              PM your entries to Sarai
                              sigpic
                              Artwork for All | Sig & avi by JadedWraith

                              Comment


                                Thanks for the tut Josi

                                Lovely bunch of textures to play with

                                Comment

                                Working...
                                X