Announcement

Collapse
No announcement yet.

Artwork for All - challenges, graphics, tutorials

Collapse
X
 
  • Filter
  • Time
  • Show
Clear All
new posts

    Oma, good to see you finding some PS time Thanks for the tut


    Originally posted by DutchIndeed View Post
    Hmpf.
    Not if you guys keep making my tuts sound as if they're not serious. I put time and effort in them, you know. It's not my fault that no one gets me and my boobling arty ways. I do *think* about what I do. I have feelings too. Every step, every 'must do' in the tutorials are little steps of love. Yes, my tuts are about making love.
    *blinks*
    Uh...

    Oh but we do take your tuts seriously, why do you think we keep asking for them?

    And please, stop ickybahing up the thread with your innuendos - artworkers are serious people you know!

    *cough, splutter*

    Awesome artwork everyone!
    It's always inspiring to see people who sort of know what they're doing bundled up in one place.
    ....which means you should feel right at home here

    *runz*

    Comment


      Cool sig! Could you please explain the stamp?
      sigpic

      Comment


        Sorry, I should have done that it in the tut

        You need to have only the layers you want to stamp visible, so click on the "eyes" (to the left of the layers) to turn off all the background layers.

        Next hit ctrl+shift+alt+e, it will merge all your visible layers into a new one.
        sigpic

        Comment


          Thanks!
          sigpic

          Comment


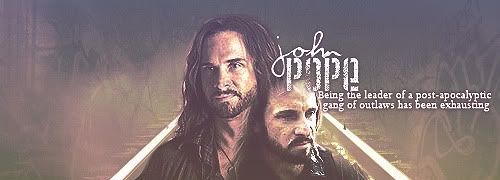
            Since I already had PS open....from this tut


            I decided to use the gradient layers differently to get a stronger colouring - Pope just didn't look right on a washed out background. I also used textures from the show so it would tie in better to Falling Skies rather than the ones in the tut......I didn't follow the tut much at all in the end, but the idea sprang from there!
            Last edited by Oma-1; 03 September 2011, 07:14 AM.
            sigpic

            Comment


              Tutorial for this sig, made in Photoshop:


              Spoiler:

              1. Start with a black background and resize and place the picture of Castle & Beckett in the middle. You don't actually need the background to be black, but it gives you a bit more leeway for the next step if it is. Sharpen the Castle/Beckett picture using the smart sharpen filter (which I find less harsh than the unsharp mask), but otherwise don't do anything to it.


              2. Add a new layer over the top and fill with black. Add a layer mask and then use a large soft brush on the mask to erase the middle of this layer, exposing Castle & Beckett underneath, but covering up the edges of that cap (particularly the two guys in the foreground on either side of them). (If you don't know how to add a layer mask, shout and I'll elaborate )


              3. Add this texture on a new layer, and set to screen at 50%. I positioned this texture so that the light spots were running along the bottom of the left hand part of the sig. Use first the gaussian blur and then the motion blur on this layer, the latter running at a slight angle to the right.


              4. Add a new layer and use a reasonably large soft white brush to paint a few highlights to either side of Castle and Beckett. Set the opacity of the layer to 10%, and then use the gaussian blur and the motion blur (with the same angle as before) on it. Then add an outer glow effect (Layer > Layer style > Outer glow). You should now have some really nice light effects.


              5. Now to do the black & white/colour thing. Add a new layer over the top and fill it with grey and set to 'color' at 100%. Add a layer mask and then use a small soft black brush to paint over Beckett's dress and necklace so that the red shows through. The great thing about layer masks is that if you go too far and erase something you shouldn't have, you can just switch your brush to white and paint it back


              6. The sig looks rather dull, so time to brighten it up. Add a new adjustment layer for brightness/contrast and increase both until you get a nice clear bright pic. This one has brightness +88 and contrast +43.


              7. Now to add the side pictures. I did this in a slightly weird way as I was fiddling, but will try to explain it coherently! Make two stamps of your sig, and move them to either side so you have an extra Beckett on the left and an extra Castle on the right. Use layer masks to remove the overlaps so they don't cover up the central picture.


              8. I didn't want the left hand Beckett's dress to be red, so I added another layer, set it to color, and painted over her with grey so that she went black & white again. Had I thought ahead I should have made the stamps first before I did the BW/colour thing, but never mind! They're still way too obvious though, but we'll get to that.


              9. I still wasn't happy with the contrast, so I made a new stamp of the whole thing and used the high pass on it (Filter > Other > High Pass). Set this layer to soft light at 100%.


              10. It looks lovely and bright now, but the side images are distracting the focus too much from the centre. So go back and make the two original layers for these two images invisible (click on the little eye next to them in the layers box). Now for them there's only the soft light version from the high pass step and the lighting effects from earlier really show through.


              11. Finally, the text. The font is Bellerose and I fiddled with its proportions using the character tab on the side of the navigator box, increasing the character height to 125%. I then duplicated the text layer, used the gaussian blur on the lower one and added a drop shadow to the top one. And that's it!

              sigpic
              Artwork for All | Sig & avi by JadedWraith

              Comment


                Awesome Josi, me lurrrrves that sig
                sigpic

                Comment


                  Love the sigs Oma and Josiane. The tuts look good and like they could be easily adapted to Gimp.
                  sigpic

                  Comment


                    Oma-1's tut inspired me to try textures, which I've never tried before (told you I was a newbie) and so I put together my first icon.
                    sigpic

                    Comment


                      Originally posted by Nolamom View Post
                      Oma-1's tut inspired me to try textures, which I've never tried before (told you I was a newbie) and so I put together my first icon.
                      http://i77.photobucket.com/albums/j5...ff/JoeIcon.jpg
                      That's brilliant! Textures will open up a whole new world for you - they can be used in so many different ways and completely change the look of your artwork

                      Comment


                        I LOVE that sig josi!!! It's gorgeous and of course it helps that it has a great couple on it.

                        sigpic
                        Coming January 2017

                        Comment


                          Cool! But I'm still unclear on what exactly stamp means, since it isn't just flatten image and duplicate layers...
                          sigpic

                          Comment


                            Originally posted by maneth View Post
                            Cool! But I'm still unclear on what exactly stamp means, since it isn't just flatten image and duplicate layers...
                            It gives you a new layer with the image flattened, but it still leaves all your layers intact. That way you can apply filters etc to polish it, but if you decide you don't like it and want to get back to your original layers you don't have to 'undo' lots of times - you simply hide the stamp layer and you're back where you were. I usually duplicate the stamped layer, sharpen the first one and apply a blur to the top one. You can also change the opacity levels etc. It's very useful if you want to play around without losing your original layers

                            Comment


                              Oma and Josiane, I love the sigs and for the tut.
                              sigpic

                              Comment


                                Alright, I'm *starting* to learn about fooling around with opacity to soften the effect. I don't understand about brushes. I think my PS is too old to add them.
                                sigpic

                                Comment

                                Working...
                                X