Announcement

Collapse
No announcement yet.

The secrets on how to make artwork of the Sam/Jack ship family thread

Collapse
X
 
  • Filter
  • Time
  • Show
Clear All
new posts

    Originally posted by val
    Aww. Thank you. :-D And you can call me Val. 8D
    OK, I will call you Val !!

    Originally posted by Oma-1
    Welcome Oris! Love your art! Fortunately,
    Thank you.

    Originally posted by Oma-1
    art doesn't require language skills.
    I am lucky !


    Hannnnnnnn, I love your video XFchemist, really ! It is so beautiful. I am fan !!
    Click and vote... For Amanda Tapping !


    Comment


      Psst, oris, do post your siggies here too!
      "Are you like, a crazy person?"
      "I am quite sure they will say so."

      Comment


        Oh, you want to say my Amanda siggies ? In black and withe ?
        Click and vote... For Amanda Tapping !


        Comment


          Amanda asked for a tut for this icon.


          So...

          Spoiler:
          1. Started off with black background and this texture sat to Multiply

          2. I croped 9 caps from Helen turning around and set them under the texture's white part so that they'll be visible.


          3. Then I played a little with the coloring and the contrast on the icon.

          Layer -> New Adjustment Layer -> Levels
          Input levels: 35; 1.22; 165


          Layer -> New Adjustment Layer -> Selective Color
          reds: -94; 91; 68; 0
          yellows: 0; 0; -62; 0
          neutrals: 0; 5; 14; -8


          4. After that it was just setting the animation. It had total of 14 frames.

          Window -> Animation

          For the first frame I turned off all the caps layers, except for the first cap, Levels, Selective coloring and the texture layers

          For each new frame I turned off the previous cap and turned on the next one. (the time between frames was set to 0.1)

          At the end to make it fade to black I just added 5 extra frames, and for each frame I lowered the opacity of the last cap (the animation of the caps went through in frames 1-9. For frame 10 the opacity of the last cap was 85%, frame 11 - opacity 65%, frame 12 - opacity 40%, frame13 - opacity 25%, frame14 - opacity 5%) After that it starts over.

          Hope that cleared things up, if not ask away. I don't promise to answer.
          sigpic

          Comment


            yep, oris

            ta for the tut, Jas!
            "Are you like, a crazy person?"
            "I am quite sure they will say so."

            Comment


              Originally posted by Es!
              yep, oris
              Oh, OK !
              I didn't post here because the tittle of this thread is "Artwork of the Sam/Jack ship".

              But...


              Click and vote... For Amanda Tapping !


              Comment


                Originally posted by oris View Post

                Oh, OK !
                I didn't post here because the tittle of this thread is "Artwork of the Sam/Jack ship".
                Oh well, all art is welcome here
                "Are you like, a crazy person?"
                "I am quite sure they will say so."

                Comment


                  New Siggie!
                  sigpic

                  Comment


                    Awesome vids, XFchemist.

                    Great B/W AT sigs, oris.

                    Beautiful Bones sig, Val. Her makeup looks like she has black eyes though. She would be prettier if she didn't do that.
                    sigpic
                    I used to trek amongst the stars, now I gate to them

                    Comment


                      CHALLENGE WEEK 86
                      from Oma


                      We're always on the lookout for new textures, so this week's challenge is to make our own! I know some of you are experts already, so to go along with the texture is a tut on how you made it Then us lesser mortals can get some tips

                      Size: WP


                      Jumble


                      SnowWhite


                      Josiane


                      Valerie


                      Jasmina


                      Cags


                      Estrela


                      CHALLENGE WEEK 87
                      (Super Sekrit Challenge)

                      from Blacky Kitten


                      Create a fantasy world and put your fave artists or heroes etc in it. Something like another beautiful planet or Alice in Wonderland. It's hard to explain in English

                      Pics: any
                      Size: any
                      Text: any

                      Example


                      Please send your challenge entries to Sarai

                      sigpic

                      Comment


                        Wow, so much awesome art, too much to mention individually! And the challenge textures are fabulous! Well done everyone *snurches*

                        And oris, all art is welcome here We've been talking about changing the title of the thread slightly to make that clear, but basically you're welcome to post anything you make
                        sigpic
                        Artwork for All | Sig & avi by JadedWraith

                        Comment


                          Love the challenge art! Great jobs everyone!
                          Hm, do the next challenge, or not. Sounds difficult, but that's usually the most fun.
                          So many things to decide, so little time to decide it.
                          New Sig/Avi combo, not to sure about them though, seems as though they have a bit much stuff... what do you guys think?

                          sigpic

                          Comment


                            Originally posted by oris View Post

                            Oh, OK !
                            I didn't post here because the tittle of this thread is "Artwork of the Sam/Jack ship".

                            But...
                            [URL=http://img69.imageshack.us/i/sanstitre2vi.jpg/http://img69.imageshack.us/img69/4149/sanstitre2vi.jpg[/URL]

                            http://img594.imageshack.us/img594/7042/minsignature.jpg
                            Originally posted by josiane View Post
                            Wow, so much awesome art, too much to mention individually! And the challenge textures are fabulous! Well done everyone *snurches*

                            And oris, all art is welcome here We've been talking about changing the title of the thread slightly to make that clear, but basically you're welcome to post anything you make
                            Point proven I think.

                            Comment


                              Originally posted by jumble View Post
                              Point proven I think.
                              You beat me to that.


                              Umm, sorry I thought Jasmina was going to post the pics with the tutorials (thought that was the point of the challenge) so I sent her the whole thing but, I see she's just doing the art not the tut so, umm, I guess I should (belatedly) post the tutorials for mine seeing as I haven't yet. Not that they are very helpful; I went to the Nad'n'Jumble school of tutorial writing y'know.


                              So, enough waffle, here's my oh-so-technical tutorials.


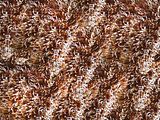
                              Texture 1.


                              Tut for texture 1.

                              Opened this image:


                              Ahem...

                              I cut out a section of the fur trim, opened a new document and pasted it all over the page - in a kind of organised way... sort of. I flattened that image then sharpened it (a few times) and messed with the contrast/brightness a bit. Duplicated the layer, set the top layer on hard light (48%). Flattened the image again.


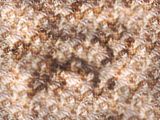
                              Texture 2


                              Tut for texture 2.

                              Made exactly the same as above but with added blurring and a bit of fiddling with the colour.


                              Texture 3


                              Tut for texture 3

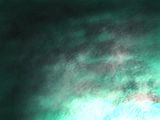
                              Opened a new document and filled the background layer with #55d7ac
                              Then using a brush set called Kinetic by ShiftyJ I faffed about with, er, splodging on different brushes, different sizes, different pressure here and there, going a few shades lighter or darker than the base colour (sorry, didn't make a note of the exact shades).
                              I then applied the burn tool and the dodge tool - again using the same brush set and varied exposure. More random splodging with this.
                              I then added a spotlight effect, with increased metalic and shinyness settings on the setting thingy.
                              I did a bit more dodging and burning and splodging.
                              I then adjusted the red curve to bring out a slighly rose hue to the grey areas.
                              Then I splodged a bit more.
                              I like splodging.


                              Texture 4.


                              Tut for texture 4.

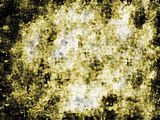
                              Made in much the same way as 3, with the same brush set but smaller size. Background colour black with a layer on top set to difference 100% and the brush colours based on colour coloured #807246 on top. Burning, dodged, sploged, sharpened and contrast//brightness/curves adjusted. before being sharpened and flattened.


                              Texture 5


                              Tut for texture 5.

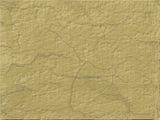
                              Started with a background of the same colur in texture 4: #807246.
                              Added a layer which I painted over in a stroked with a brush from a set called "wind effects". I used the same colour as above but lightened it.
                              Added a new layer with a crackle effect brush, slightyl darker shade. Set layer to bevel/emboss.
                              Added a new layer and, er, splodged on a set of brush strokes called "cracks" usign an even darker shade. Set the layer to bevel/emboss.


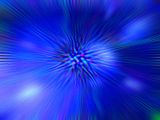
                              Here's a texture / background I made years ago in my X Files arty days. Sorry no tut because, well, I had no idea what I was doing, but it's nice enough to share, I think. I did try and duplicate this time so I could do a tut but could not get the sharpness of the lines. I know there was twirl, radial blur (zoom) and lots of sharpnening involved but, as I say, made 10 years ago so I can't remember the exact method used.


                              I also have a stack more - textures and backgrounds and general resources. Some of the more abstract ones I made myself and some I snurched or downloaded but I've uploaded them all here if anyone wants them: http://s2.photobucket.com/albums/y23...t%20resources/
                              sigpic

                              Comment


                                @ Cags faffing about

                                Comment

                                Working...
                                X