Welcome to GateWorld Forum! If this is your first visit, we hope you'll sign up and join our Stargate community. If you have questions, start with the FAQ. We've been going strong since 2004, are we are glad you are here.
We haven't done one of these in ages... this is your chance this week to try and improve on some of your earlier artwork. If there's a piece where you liked the concept/inspiration but you just couldn't get it to work like you hoped, or even a piece that you were pleased with at the time but know you could do better now, give it another go!
Post both your original attempt and the new improved version to show us what you've done!
PM your entries to Jumble by 5pm Friday UK time!
Please sign your artwork
I'd like to wish my fellow artists a Safe and Happy Easter weekend
SPOILER ALERT:
Spoiler:
The Tomb is empty!
This is the Assassin's Way part 17 complete "Elegant beauty is Nature. but only for the gentle and soft Flower" ~Hu Ge
"The one thing every new hairstylist must learn is how to do hair in a combat zone!" Bob; owner of Bob & Weave's Combat Salon in Red Dust Club, an original story currently in progress
We haven't done one of these in ages... this is your chance this week to try and improve on some of your earlier artwork. If there's a piece where you liked the concept/inspiration but you just couldn't get it to work like you hoped, or even a piece that you were pleased with at the time but know you could do better now, give it another go!
This week is a Tutorial Week. For the first week every month, we don’t issue a challenge, but instead want to encourage thread participants to share their expertise and try something new, using tutorials.
This is how it works:
1. Share a tutorial: Write a tutorial for a piece of art you have made recently, or post a piece of art you have made with the link to the tutorial you followed when you made it.
2. Follow a tutorial: Use one (or more) of the tutorials that other thread members have shared during the week to make a piece of art of your own.
The idea is that we should both teach something and learn something throughout the week
It’s not obligatory to do both, if you’re limited for time, but we’d like to encourage you to please both share and follow at least one tutorial if at all possible.
At the end of the week we will post all the tutorials along with any art made following each tutorial, so that we can see all the different interpretations all together.
Please PM your entries, including a link to the tut, to Josiane by 5pm (UK time) on Friday. Please remember to put your name on your artwork - thanks
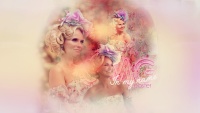
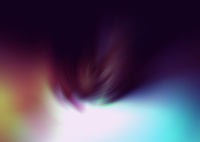
1. Open a new canvas. Add this texture, resized to fill it.
2. Duplicate the layer and flip it horizontally, then use a layer mask to erase the right hand side of this top layer so that you end up with a sort of mirrored circle from the two textures in the middle of your canvas.
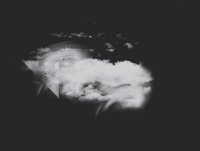
3. Now add your character pics and blend them in to each other and the background texture using layer masks.
4. Next add this texture a couple of times, set to screen, and positioned so that the light bit both provides a bit of a shine and cunningly helps mask some of your maybe less neatly blended in bits from the previous step
5. Now add this texture, also set to screen. Resize it so that it fills the canvas and use the gaussian blur on it with a medium sort of size setting (10-20px ish). Position it so that the curve of the light bit fits at the bottom with the curve of your circle from the background texture.
6. Next add this texture, again resized to fill the canvas, and set it to multiply. Use the gaussian blur on this one too to smooth out the details so you just get the colouring.
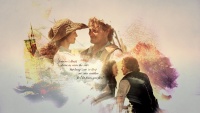
7. Next add the text. The fonts are Angelface Regular and Champagne & Limousines, and the colours, as always, are picked using the eyedropper. Add an outer glow effect to both of the text layers - colour #ffffff, blend mode screen, opacity 35%, spread 0, size 7px. "In my name" is also curved slightly using the warp text function - style 'arch' with a bend of -10%, and then rotated slightly.
8. Now add a curves layer to brighten things up - just one point on this one (input 177, output 206), but as always, YMMV so play around with the curve until you get something that works for your pics
9. Now add a selective color layer:
- Yellows: C +67, M -16, Y -74, B -8
- Magentas: C 0, M +35, Y 0, B 0
- Blacks: C 0, M 0, Y -17, B +7
This is taking out some of the yellow tones and boosting the bluey-pinks
10. And finally, add a new layer, fill with #ebebeb and set to color burn, just to finish it all off nicely
And while I'm in tut writing mode, have one for this one too:
Spoiler:
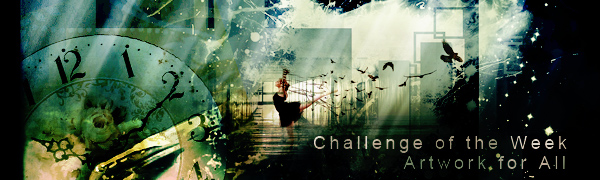
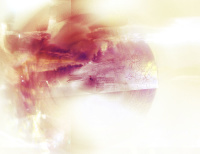
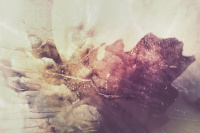
1. Open a new canvas and fill it with this texture
2. Next add your character pics, positioned and blended in so they fit well with the background texture.
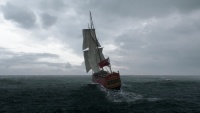
3. Now add this screenshot set to color burn and use a layer mask to erase all the bits of it you don't want or that go over your character pics too much. Basically you just want the silhouette of the ship.
4. Next add this texture, inverted (so it's a black smudge on white - Ctrl+I in photoshop). Set it to linear dodge and resize and rotate it to an angle to fill the canvas and mean that your character pics show through.
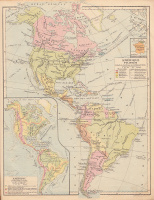
5. Next add the two map textures, both set to darken at 30%, and use layer masks to blend them in and erase any parts that go over your character pics too much.
6. Now add this texture, resized to fill the canvas, set to soft light
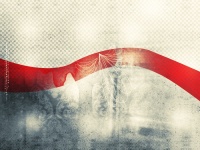
7. And then this texture, not resized, just positioned so you get the red swish linking your pictures nicely, and use a layer mask to blend it in and erase any parts you don't want showing.
8. Now some colouring. First a curves adjustment layer:
- Point 1: input 209, output 218
- Point 2: input 129, output 109
But as always, this will depend on your pictures, so just play around with the curve until you get something that looks nice
9. Then a selective color layer:
- Yellows: C 0, M 0, Y -40, B 0
- Whites: C 0, M 0, Y 0, B +100
- Blacks: C 0, M 0, Y 0, B +16
10. And a color balance layer:
- Shadows: C-R 0, M-G 0, Y-B +16
- Highlights: C-R 0, M-G 0, Y-B +23
11. Now duplicate the texture from step 6 and move it on top, set to multiply at 30%.
12. Now the text. The font is Edwardian Script, colour #0c0a0f (a very dark purple) and set each text layer to color burn.
13. Make a stamp of the whole thing and sharpen using filter > paint daubs. Use a layer mask to erase any bits which look overly sharp.
14. And finally my favourite last trick to finish things off nicely - add a layer, fill with #ebebeb and set to color burn.


 Back in a tick with the post


Comment