Announcement

Collapse
No announcement yet.

Artwork for All - challenges, graphics, tutorials

Collapse
X
 
  • Filter
  • Time
  • Show
Clear All
new posts

    You are welcome, Sheppard.

    How does one do a layer mask and stamp in photoshop 8? What are they?
    sigpic
    Thanks to Jumble for the icon and siggy.
    My ff.net My Own Website

    Comment


      Originally posted by Stargate78fan View Post
      How does one do a layer mask and stamp in photoshop 8? What are they?
      is one talking to me?
      sigpic
      Ohhhhhhhh WHAM BAM THANK YOU MA'AM

      Comment


        A layer mask can be used to hide and reveal parts of a layer without actually destroying the layer itself (unlike the eraser), it's very handy for blending. The clone stamp tool is used to copy parts of an image to other parts of the same image, it's also pretty handy for blending and for getting rid of unwanted bits of an image. I suggest a websearch for basic tutorials on how to use the tools in your version of PS.
        sigpic

        Comment


          Oh, and my entry into the challenge.


          Thanks to lg for the background texture and downtonline for the caps.
          sigpic

          Comment


            Great new sig, LtCol! I like the warm and cool tones to the pics.

            Originally posted by Stargate78fan View Post
            Wonderful artworks, Nola, Sheppard, Yami and ShaViva.

            Ladygris, can you please do a tutorial for your John Sheppard and Teyla wallpaper from the last challange?
            I've already got one made up! Not that I was expecting it here. It was for someone else who hasn't contacted me yet. Give me a moment, and I'll post it up.

            Great entry, Mane! That white wall is so versatile. I used it to make another wallie, this one not fan-related.


            It uses these images: and two other textures from this tut by josi.

            Comment


              Here's the tut Stargate78Fan requested.

              To make this:

              Spoiler:
              You will need:

              Inner Universe Brushes

              Open your canvas to the size you want. Fill with Black.

              Open your two main character pictures. Resize, position, and erase the background on both of them. All other images will be placed behind these two until the very last texture, the white rose.

              Add the first texture. Duplicate. Resize and use a large, fuzzy brush to erase the top layer, resulting in the color covering the majority of the center of the canvas. Set to Normal, opacity 100%.

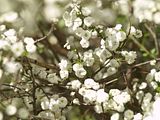
              Open the White Flowers texture. Resize and set to Lighten Only, opacity 100%. Depending on your artwork, you may need to duplicate and/or resize to get the look you want.

              New Layer, color #7a7cc9. Set to Lighten Only, opacity 100%.

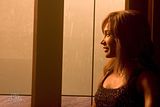
              Open pic of Teyla from Hot Zone. Set to Overlay, opacity 100%. Position so that her profile faces left, in the colored part of the background. The flowers will seem to cover a large portion of her face, so position it carefully to get the look you want.

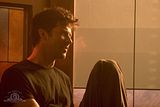
              Repeat with the pic of John from Hot Zone. Set to the same layer mode, same opacity. Position this one facing right, just behind the main picture of John. Again, as the flowers will cover somewhat, position it so that you have the outline of his profile.

              Erase the hard edges of both these new pictures as necessary.

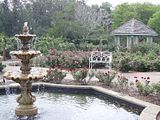
              Add Garden Fountain. Resize as necessary, set to Lighten Only, opacity 100%. Crop the fountain out of it and position it in the lower left corner of the canvas. Only a portion of the fountain will show, adding some sparkle.

              Duplicate the fountain and reposition it on the lower right corner of the canvas. Set this one to Lighten Only, opacity 100%. Position it so that only the top of the fountain is showing.

              Add White Rose texture on top of the two main character pictures. Set to Overlay, opacity 100%. Use the smudge tool to smooth out the texture over their faces. This texture primarily warms the layers considerably.

              Layer-->New from Visible. (I do this instead of just making a stamp of the layers because I can go back and make changes to the base easily.)

              Now, for some coloring on the New Visible Layer.
              Spoiler:

              Curves:
              Value: 81, 115
              140, 185

              Color Balance:
              Highlights: -8, -1, 18
              Midtones: -18, 28, 38
              Shadows: 0, 0, 0


              New Fill Layer, color #a7c0ed. Set to Normal, opacity 100%. Using the Inner Universe Brushes, erase the color away from the canvas to reveal only what you wish to reveal. Vary the size of your brush and type of brush so you get some whispy edges to the color.

              Add text.
              Spoiler:
              For “Lost,” I used Respective, color #eff8f9, size 2.550 inches. Add a drop shadow in color #233853, offset X and Y both 0. Add a second drop shadow, color #465163, same offset X and Y.

              For “without you,” I used Optimus Princeps Semi-Bold, color #465163. Add a drop shadow in color #ffffff, offset X and Y both 0. Set opacity on the Drop Shadow at 100%, and duplicate the drop shadow layer however many times you need to give it a nice “glow.”

              Duplicate the original layer of “Lost.” Layer-->Transparency-->Alpha to Transparency. Then, go to Select, and choose Grow. Grow the layer by one. Then, with your paintbrush on Normal, paint the new layer with color #465163. Move the layer behind your original text layer, and lower the opacity until it somewhat blends with the drop shadows, sharpening the edges of the text.


              New Layer from Visible.

              Brightness/Contrast.
              Brightness: -30
              Contrast: 30

              And, you're done.


              If you have any questions, please ask.

              Comment


                Lovely arts everyone! And thank yous to all who commented on my art.

                Thanks for the tut lg

                I was going to post these last night, right before I went to bed, but Photoshop froze and closed right before I could save them. Luckily I remembered most of how I put them together.

                A non-entry:


                And an entry:


                The background used in the non entry is from this pack: Large Grungey Text Textures, the frame is from this pack: Vintage Textures

                The background of the entry wallie is from this pack: Texture Pack 02
                sigpic
                Icon and Sig by me.

                Comment


                  Originally posted by Stargate78fan View Post
                  You are welcome, Sheppard.

                  How does one do a layer mask and stamp in photoshop 8? What are they?
                  Do you mean when a tut says 'make a stamp'? If so, in CS3 it's Shift+Ctrl+Alt+e, all held down together. It creates a new layer with a copy of the whole thing like flatten image, but leaves all the other layers intact - helpful if you want to go back and make changes or if you get asked for a tut

                  Lovely wps Yami Why is the first one not an entry? It qualifies

                  Comment


                    Thanks Jumble! The reason is I used 2 textures and 4 pictures for that wallie. And the requirement was only 3 pictures. But if you want, I can still submit it.
                    sigpic
                    Icon and Sig by me.

                    Comment


                      Originally posted by yamiinsane View Post
                      Thanks Jumble! The reason is I used 2 textures and 4 pictures for that wallie. And the requirement was only 3 pictures. But if you want, I can still submit it.
                      The challenge is to use at least 3 pics Definitely submit it, it's lovely

                      Comment


                        Lovely artwork, yami! And thanks for the links to those textures!

                        Comment


                          Great work everyone. And thank you to all who had kind words. I really need to get busy - I've seen some terrific stuff this weekend!
                          sigpic

                          Comment


                            Thanks lg And you are most welcome
                            sigpic
                            Icon and Sig by me.

                            Comment


                              Gorgeous work everyone! And lg, I love what you've done from that tut of mine
                              sigpic
                              Artwork for All | Sig & avi by JadedWraith

                              Comment


                                thanks lg and great work mane
                                sigpic
                                Ohhhhhhhh WHAM BAM THANK YOU MA'AM

                                Comment

                                Working...
                                X