
First attempt at a tut… *crosses fingers it makes sense*
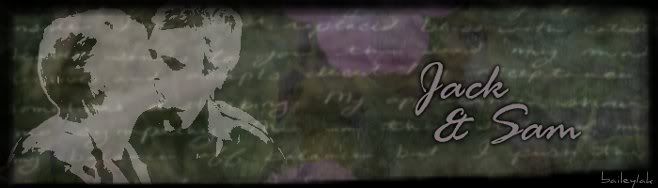
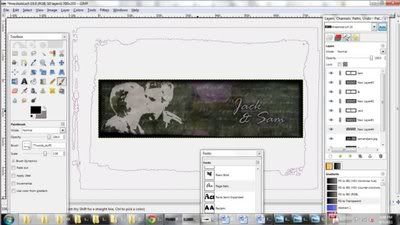
So… this is how I made this signature with Gimp…
This tut turned out really long… sorry bout that. Any questions please ask.
So… this is how I made this signature with Gimp…
Spoiler:
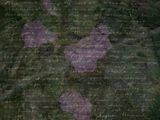
I used this background I found on DA
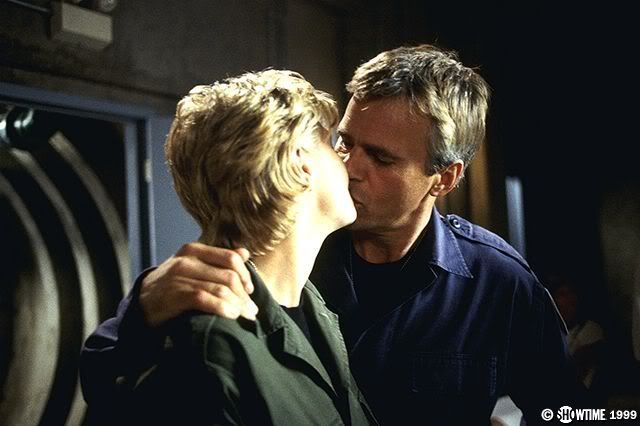
And this pic of Jack and Sam
I opened my base layer in black…
Added the background as a layer and shrunk it down to 800-ish wide using the scale tool. Then moved it up and down till I found a section I liked.
Then I opened up the Sam and Jack pic as a layer and again used the scale tool to shrink it down to the size I was looking for.
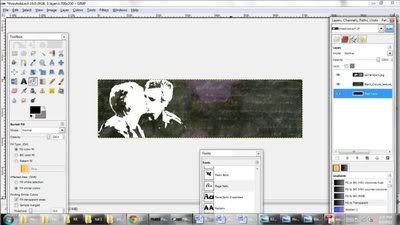
Then on the menu bar I picked Colors – Curves. I use it to bring about a contrast of light and dark that highlights the couple the best. The brightest sections are going to turn out white and the darker shadows are going to be black in the next step so keep this in mind as you tamper with the contrast.
Then on the menu bar I picked Colors – Threshold. I moved the bar to the left and right until I found the best amount of white to represent the pic. You may need to undo and redo these last two steps until you get what you are looking for.
Then set the picture layer to Screen.
With the Erase tool delete any parts of the picture you would like removed. I find that the largest solid circle set down to about a size 26 or so. Whatever the size is that makes it look like a square. It gives it the best sharp line as you are removing the excess from the picture.
Now I changed the color from white to the same color as the text in the texture layer.
Use the Color Picker tool to pick the color you want. Then you will need to get the number of the color for the next step. I click into the color and copy the numbers so I don’t have to write it down.
Make the picture of the couple the active layer. On the menu bar I picked Colors – Colorify, then click on the Custom Color. Type or paste the color number in and then click on okay. Play with the opacity if wanted or needed.
Now for the text. I used the very simple fallback text of their names… not real creative.
The font I used was Rage Italic set at 60 in size.
I added a plack halo behind it to soften it a little bit. This is done by right clicking on the text layer and choosing Alpha to Selection.
Right click on your text layer and in that menu pick Alpha to Selection – this will put a dotted line around your words.
Then on the menu bar Select – Grow. I chose by 1.
Add a layer…
From menu bar Layer – New Layer. (make sure you have it set for Transparency)
Move the new transparent layer below the text layer and make sure it is your selected (highlighted) layer.
Now I pick the paint brush and pick the largest circle (and I tend to push it up to a 10.0 for good measure) Make sure that the color is set to be the color you want. I used the same color that I used in the colorify step.
Paint your text and as you do you will see it outline your text in the color you selected.
When done painting, from the Select menu at the top of the page again, pick None.
From the menu bar Filters --Blur, Gaussian blur. I chose the values to 5px for both Horizontal and vertical fields.
Now for the border…
Created a new layer (I like the ability to delete and start over many times)
I picked a brush called 77words stuff1 that I found on DA
I enlarged the brush to about 3.56 or so. Using black I painted just the bottom and left side, then I painted the top and right side. You will probably need to play with it to get the affect you want.
Now I typically do an inordinate amount of tweaking.
I changed the opacity on the pic of Jack and same to 61.8
I changed the opacity of the text to 91.8
Using the flip tool I also flipped the border layer. Just think if fits the sig better flipped.

And this pic of Jack and Sam
I opened my base layer in black…
Added the background as a layer and shrunk it down to 800-ish wide using the scale tool. Then moved it up and down till I found a section I liked.
Then I opened up the Sam and Jack pic as a layer and again used the scale tool to shrink it down to the size I was looking for.
Then on the menu bar I picked Colors – Curves. I use it to bring about a contrast of light and dark that highlights the couple the best. The brightest sections are going to turn out white and the darker shadows are going to be black in the next step so keep this in mind as you tamper with the contrast.
Then on the menu bar I picked Colors – Threshold. I moved the bar to the left and right until I found the best amount of white to represent the pic. You may need to undo and redo these last two steps until you get what you are looking for.
Then set the picture layer to Screen.
With the Erase tool delete any parts of the picture you would like removed. I find that the largest solid circle set down to about a size 26 or so. Whatever the size is that makes it look like a square. It gives it the best sharp line as you are removing the excess from the picture.
Now I changed the color from white to the same color as the text in the texture layer.
Use the Color Picker tool to pick the color you want. Then you will need to get the number of the color for the next step. I click into the color and copy the numbers so I don’t have to write it down.
Make the picture of the couple the active layer. On the menu bar I picked Colors – Colorify, then click on the Custom Color. Type or paste the color number in and then click on okay. Play with the opacity if wanted or needed.
Now for the text. I used the very simple fallback text of their names… not real creative.
The font I used was Rage Italic set at 60 in size.
I added a plack halo behind it to soften it a little bit. This is done by right clicking on the text layer and choosing Alpha to Selection.
Right click on your text layer and in that menu pick Alpha to Selection – this will put a dotted line around your words.
Then on the menu bar Select – Grow. I chose by 1.
Add a layer…
From menu bar Layer – New Layer. (make sure you have it set for Transparency)
Move the new transparent layer below the text layer and make sure it is your selected (highlighted) layer.
Now I pick the paint brush and pick the largest circle (and I tend to push it up to a 10.0 for good measure) Make sure that the color is set to be the color you want. I used the same color that I used in the colorify step.
Paint your text and as you do you will see it outline your text in the color you selected.
When done painting, from the Select menu at the top of the page again, pick None.
From the menu bar Filters --Blur, Gaussian blur. I chose the values to 5px for both Horizontal and vertical fields.
Now for the border…
Created a new layer (I like the ability to delete and start over many times)
I picked a brush called 77words stuff1 that I found on DA
I enlarged the brush to about 3.56 or so. Using black I painted just the bottom and left side, then I painted the top and right side. You will probably need to play with it to get the affect you want.
Now I typically do an inordinate amount of tweaking.
I changed the opacity on the pic of Jack and same to 61.8
I changed the opacity of the text to 91.8
Using the flip tool I also flipped the border layer. Just think if fits the sig better flipped.
This tut turned out really long… sorry bout that. Any questions please ask.


 Hence why I've already done so many of them.

Comment