
Is that a challenge entry Shep? Looks good! It would even work as an avi.
-
sigpic
-
yeah it is, thanks, fell free to snuch it i'll do an sig in a few minssigpicOhhhhhhhh WHAM BAM THANK YOU MA'AMComment
-
A new entry from me.

I very rarely make anything without models, or use gradients as a text effect.sigpic
Comment
-
nice as it was loading i was thinking of Jurassic park
sigpicOhhhhhhhh WHAM BAM THANK YOU MA'AM
as it was loading i was thinking of Jurassic park
sigpicOhhhhhhhh WHAM BAM THANK YOU MA'AMComment
-
Cool! I wasn't thinking of that when I made it, but why not?sigpic
Comment
-
Thanks. Most of the layers were for the text, each letter done individually with about half a dozen filters each, just glad I didn't pick a longer word!!Originally posted by Estrela View Post
Nice work Yamii, Estrela, Nola, LCJS and Maneth , going to be an interesting post this week
Now this one definitely isn't me. It has pink and blue text AND (I hope you're paying attention Jumble and lg) flowers!!!
I'm not sure what came over me *goes to lie down for a bit*
 sigpic
Thank you ladygris for my lovely sig and avi
Comment
-
Gorgeous challenge arties everyone!!
MR that is stunning - care to pull together a tut for that one as well?!
 sigpic
Artwork for AllComment
-
thanks MR nice work to!sigpicOhhhhhhhh WHAM BAM THANK YOU MA'AMComment
-
sigpicOhhhhhhhh WHAM BAM THANK YOU MA'AMComment
-
*mumbles something about doing more tuts this week than in tut week!!*Originally posted by Sarai View Post
Give me a little while and I'll see what I can come up with - it was more futzing than anything but I actually remembered to save the file this time!!
sigpic
Thank you ladygris for my lovely sig and aviComment
-
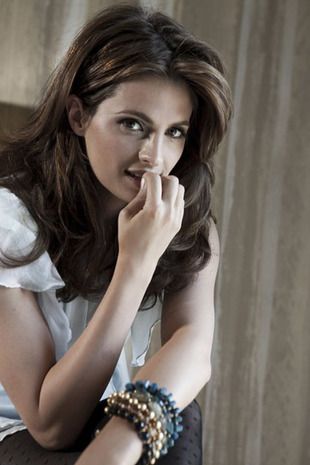
Seeing as Sarai asked so nicely
A tut for the Stana Katic sig :
This may not be exactly right - I know I did a bit of futzing with the colour somewhere but can't seem to figure out where right now, but the general idea is here
Spoiler:
And there we go, my second tut of a non-tut week! Hopefully it's understandable
sigpic
Thank you ladygris for my lovely sig and aviComment
-
Thanks MR And thanks for the tut, the banner is gorgeous!
LCJS: Love the Spock banner/avi
Here is a texture that I made while just playing around with the filters/renders in Gimp.
 sigpic
Icon and Sig by me.
Comment
-

Thanks, cool texture!sigpic
Comment
-
Thanks for the tut MR May I make a suggestion? When posting tuts, its helpful if you include the piece of artwork that the tut is for - saves scrolling back to find it
Nice texture Yami
Comment
-
Fabulous artworks everyone. Such wonderful entries and I wish I had more time to play. I miss playing in photoshop.
Mane, my little one is inquisitive and can't help himself. He likes to know what's going on and doesn't like to miss out on anything. My little fella is nearly one (17th of June). How old is your little one?Comment


Comment