Announcement

Collapse
No announcement yet.

Artwork for All - challenges, graphics, tutorials

Collapse
X
 
  • Filter
  • Time
  • Show
Clear All
new posts

    Sorry it's been a while, I have been distracted by some video games XD

    But here are two new arts

    Blue eyes

    Bird-winged heart

    Sorry for the linking but they are too big to post them here to show up

    Comment


      This is my first try at tut so, if something is unclear, just ask me. No comments on the grammar and spelling please
      I'was giggling while I wrote it, because it's ridiculously simple.

      Making this:


      Spoiler:

      The ridiculously simple and basic Jeremy Renner signature:
      These are the resources you’ll need.


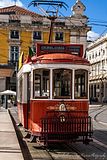
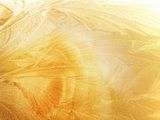
      The yellowish texture I got from Scifan, the curvy red line one from the Shadowplay Forum, the tram photo from Facebook and the Jeremy Renner pic from someone (thank you!) in the Hawkeye/ Jeremy Renner Thunker thread in GW( very inspiring place ):

      1. Create layer 1, with a 1000 pix width x 360 pix height canvas and leave it empty.

      2. On layer 2, paste the curvy red texture and adjust the size and position it until you get the most effect of the red curve. Set this layer on screen.

      On layer 1, use a brush you’re comfortable with to paint, with black, exactly under the mentioned curve, to make it more visible. Obviously, you don't need to be very neat.


      (I had another layer underneath, which I later deleted, that needed the second layer being set to screen to be visible. If you don’t feel like working with brushes, just add the first texture and set it to normal, and the final effect will be similar…).

      3. Position the tram photo on the left and resize it so it fits (normal). What I did was trying to align the grooves parallel to the tram tracks, in a way that created a continuous curved line with the first texture. Then, I erased the background on the photo leaving just parts of it on the red curve. I played with the eraser opacity, on both layers, so I could blend the background of tram photo layer and the texture layer in a way that looked more “natural”.


      4. Very important step: add Jeremy picture on the right and erase the background around him (layer mode normal).

      5. Add the yellowish texture, from scifan, position it as you like it and set it to soft light, opacity 100%.

      6. Text :
      ”Takes you anywhere”, colour b51f0c ( a red I chose from the texture), Font Pristina ( PS default), regular, 24 pt, crisp. Afterwards, I selected layer>layer style> stroke and just adjusted the stroke size to 1, with efc36f as the chosen colour (again, a colour already on the canvas).

      “IMAGINATION , black (00000), Neou (OT1), bold, strong, 24pt. I got this Font from Dafont.com.

      http://http://www.dafont.com/search.php?q=NEOU

      Resize the image to 500 x 180.

      And that’s all, folks. As I said, it’s basic.
      sigpic
      Beautiful signature and avatar by Yamiinsane. You're a mind reader!
      Aristides de Sousa Mendes

      Comment


        Tha ks so much jaded!

        sigpic
        Coming January 2017

        Comment


          Originally posted by m&mnm317 View Post
          Tha ks so much jaded!
          You're welcome.
          sigpic
          Beautiful signature and avatar by Yamiinsane. You're a mind reader!
          Aristides de Sousa Mendes

          Comment


            Here is how to make my Rick Castle Wallpaper in Photoshop CS5 as lg requested

            Spoiler:

            1) Open a new document, I chose 1920x1080, fill with black.

            2) Open 4_31_vikyvampirs90 and place in the document. Rotate 90 degrees and Gaussian blur it. I used 49.6 for the blur. Blend in with background.

            3) Open 1_31_vikyvampirs90 and place in the document. Resize to fill the entire canvas. Set to Screen, 100%. Go back to the first texture and make sure it lines up with the top and bottom of the second texure, you may have to resize the texture.

            4) Open 3_40_vikyvampirs90 and place in the document. Resize 'til the entire texure fills width-wise. Set to Screen, 30% and put it at the top of the canvas. Erase what you don't like.

            5) Open 5_set11_vikyvampirs90 and place in the document. Leave as is and move to the bottom left of the second texture. Set to Screen, 100%. Erase what you don't like.

            6) Open 4_vikyvampirs90 and place in the document. Leave as is and move to the bottom right of the second texture. Set to Screen, 60%. Erase what you don't like.

            7) Open up a picture of your main character and place in the document. Resize if needed and set to Multiply, 100%. Go to the second texture and with the magic wand, click right outside the white "box." That way it'll be easier for you to get your picture cut into the white "box." Go back to this picture and click on the layer mask button located at the bottom of the layers box (on the right.) You may have to invert the mask (ctrl+I) Clean up whatever you don't like.

            8) Open these three textures (1, 2, 3) and place them in the document. Organize them from top to bottom on the left side of the white "box," place them in whatever order you like and make sure they are lined up.

            9) Duplicate those three textures and flip horizontal, then rotate 90 degrees. Move to the bottom right of the white "box" and skew the left side upwards a little to align the edges with the white box.

            10) Open another pic of your character, one that has writing of some kind or maybe the title of the movie or tv show, etc. they are working in, and duplicate the layer. Hide the duplicate layer for now and give the other layer a layer mask. Erase EVERYTHING but the words/writing and set the layer to Soft Light, 100%. Un-hide the duplicated layer and use the same Gaussian Blur on it, Blur it out. Layer mask and erase where the words/writing is so that the words/writing can come through. Set this layer to Soft Light, 100%.

            11) COLORING:
            - Curves: Increase Contrast (RGB)
            - Gradient Map: (I lost the urls where I got the Washed Away Art Gradients so until I find them again here are the colors: ) bd8a39 to 510600. Set to Soft Light, 50%.
            - Gradient Map: 1a3da2 to fbf49c set to Soft Light, 100%.
            - Pattern Fill: Use Pattern 23 from this pack and set to Soft Light, 100%.

            12) I didn't like how light certain areas got so I created a blank layer and set the layer to Soft Light, 100%. I used my favorite blending brush, Talei-stock's Grunge brushes 2, and with black, darken the areas that you want darkened.

            13) TEXT:
            - Rick Castle: Jellyka's King's Hat, 60 pt. Fill, 0%. Blending Options: Drop Shadow: Default, Bevel and Emboss: Default except Style is Pillow Emboss, Color Overlay: 521441, Normal, 30%, Gradient Overlay: 2d2b30 to 5c7594 rest default.
            -Warp text: Bulge: Horizontal, +27, -74, -82.
            -Place in the main picture area.

            14) Create a stamp of everything and use whatever filters you use to finalize your art. I used Topaz Clean, Crispstyle (default) and Paint Daubs to finalize my wallpaper.

            15) Watermark your work, if you do, and you are finished!


            If you have any questions, feel free to ask. I also posted this tutorial in my blog and on livejournal, both have images for almost every step so if you wish to go there, you may
            Last edited by yamiinsane; 08 June 2013, 01:17 PM. Reason: Forgot one of the urls...
            sigpic
            Icon and Sig by me.

            Comment


              Originally posted by yamiinsane View Post
              Here is how to make my Rick Castle Wallpaper in Photoshop CS5 as lg requested

              Spoiler:

              1) Open a new document, I chose 1920x1080, fill with black.

              2) Open 4_31_vikyvampirs90 and place in the document. Rotate 90 degrees and Gaussian blur it. I used 49.6 for the blur. Blend in with background.

              3) Open 1_31_vikyvampirs90 and place in the document. Resize to fill the entire canvas. Set to Screen, 100%. Go back to the first texture and make sure it lines up with the top and bottom of the second texure, you may have to resize the texture.

              4) Open 3_40_vikyvampirs90 and place in the document. Resize 'til the entire texure fills width-wise. Set to Screen, 30% and put it at the top of the canvas. Erase what you don't like.

              5) Open 5_set11_vikyvampirs90 and place in the document. Leave as is and move to the bottom left of the second texture. Set to Screen, 100%. Erase what you don't like.

              6) Open 4_vikyvampirs90 and place in the document. Leave as is and move to the bottom right of the second texture. Set to Screen, 60%. Erase what you don't like.

              7) Open up a picture of your main character and place in the document. Resize if needed and set to Multiply, 100%. Go to the second texture and with the magic wand, click right outside the white "box." That way it'll be easier for you to get your picture cut into the white "box." Go back to this picture and click on the layer mask button located at the bottom of the layers box (on the right.) You may have to invert the mask (ctrl+I) Clean up whatever you don't like.

              8) Open these three textures (1, 2, 3) and place them in the document. Organize them from top to bottom on the left side of the white "box," place them in whatever order you like and make sure they are lined up.

              9) Duplicate those three textures and flip horizontal, then rotate 90 degrees. Move to the bottom right of the white "box" and skew the left side upwards a little to align the edges with the white box.

              10) Open another pic of your character, one that has writing of some kind or maybe the title of the movie or tv show, etc. they are working in, and duplicate the layer. Hide the duplicate layer for now and give the other layer a layer mask. Erase EVERYTHING but the words/writing and set the layer to Soft Light, 100%. Un-hide the duplicated layer and use the same Gaussian Blur on it, Blur it out. Layer mask and erase where the words/writing is so that the words/writing can come through. Set this layer to Soft Light, 100%.

              11) COLORING:
              - Curves: Increase Contrast (RGB)
              - Gradient Map: (I lost the urls where I got the Washed Away Art Gradients so until I find them again here are the colors: ) bd8a39 to 510600. Set to Soft Light, 50%.
              - Gradient Map: 1a3da2 to fbf49c set to Soft Light, 100%.
              - Pattern Fill: Use Pattern 23 from this pack and set to Soft Light, 100%.

              12) I didn't like how light certain areas got so I created a blank layer and set the layer to Soft Light, 100%. I used my favorite blending brush, Talei-stock's Grunge brushes 2, and with black, darken the areas that you want darkened.

              13) TEXT:
              - Rick Castle: Jellyka's King's Hat, 60 pt. Fill, 0%. Blending Options: Drop Shadow: Default, Bevel and Emboss: Default except Style is Pillow Emboss, Color Overlay: 521441, Normal, 30%, Gradient Overlay: 2d2b30 to 5c7594 rest default.
              -Warp text: Bulge: Horizontal, +27, -74, -82.
              -Place in the main picture area.

              14) Create a stamp of everything and use whatever filters you use to finalize your art. I used Topaz Clean, Crispstyle (default) and Paint Daubs to finalize my wallpaper.

              15) Watermark your work, if you do, and you are finished!


              If you have any questions, feel free to ask. I also posted this tutorial in my blog and on livejournal, both have images for almost every step so if you wish to go there, you may
              Gorgeous, yamii and thank you . I'll memorize it to try it later, it's really lovely. Oh and and your photo manip is perfect (I couldn't tell it was a manip... and I generally can.
              sigpic
              Beautiful signature and avatar by Yamiinsane. You're a mind reader!
              Aristides de Sousa Mendes

              Comment


                Yay! Thanks for the tut, yami! Definitely will be trying it later!

                Comment


                  Originally posted by scifan View Post
                  M!!! *Tackel HUGS*
                  Besides a stupid chest cold I'm not doing too bad. Meant to tackle hug you yesterday, but sadly I forgot. How have you been? So good to see you in here. Thank you so much. She's one of my new obsession ;rolleyes: and made it for River's 5th anniversary.
                  Oof! *tacklehugs back* It's great to see ya dear I've been alright.. I've tried doing some art here and there but nothing has jumped out at me until I discovered White Collar (and went through four seasons in about 2.5days ) then Neal came

                  I love River! Specifically I love her with 11; they have this chemistry that I just love.

                  sigpic
                  Coming January 2017

                  Comment


                    Great entries everyone for last challenge! I forgot to send in my entry...

                    Very nice tut so far everyone.
                    sigpic

                    Comment


                      Originally posted by syfyfan View Post
                      Great entries everyone for last challenge! I forgot to send in my entry...

                      Very nice tut so far everyone.
                      SY!!!!!!!!!!!*tackle hugs* Lovely Joe art Makes me wanna watch SGA

                      sigpic
                      Coming January 2017

                      Comment


                        Originally posted by m&mnm317 View Post
                        SY!!!!!!!!!!!*tackle hugs* Lovely Joe art Makes me wanna watch SGA
                        Hi!!! Thank you
                        sigpic

                        Comment


                          Originally posted by syfyfan View Post
                          Hi!!! Thank you
                          That hug smiley is cute!

                          sigpic
                          Coming January 2017

                          Comment


                            Originally posted by m&mnm317 View Post
                            That hug smiley is cute!
                            sigpic

                            Comment


                              Originally posted by syfyfan View Post

                              sigpic
                              Coming January 2017

                              Comment


                                Originally posted by yamiinsane View Post
                                Here is how to make my Rick Castle Wallpaper in Photoshop CS5 as lg requested

                                Spoiler:

                                1) Open a new document, I chose 1920x1080, fill with black.

                                2) Open 4_31_vikyvampirs90 and place in the document. Rotate 90 degrees and Gaussian blur it. I used 49.6 for the blur. Blend in with background.

                                3) Open http://i1085.photobucket.com/albums/...ampirs90-1.png and place in the document. Resize to fill the entire canvas. Set to Screen, 100%. Go back to the first texture and make sure it lines up with the top and bottom of the second texure, you may have to resize the texture.

                                4) Open http://i1085.photobucket.com/albums/j439/yamiinsane/Stocks%20used%20for%20Artwork/3_40_vikyvampirs90.png3_40_vikyvampirs90[/URL] and place in the document. Resize 'til the entire texure fills width-wise. Set to Screen, 30% and put it at the top of the canvas. Erase what you don't like.

                                5) Open 5_set11_vikyvampirs90 and place in the document. Leave as is and move to the bottom left of the second texture. Set to Screen, 100%. Erase what you don't like.

                                6) Open 4_vikyvampirs90 and place in the document. Leave as is and move to the bottom right of the second texture. Set to Screen, 60%. Erase what you don't like.

                                7) Open up a picture of your main character and place in the document. Resize if needed and set to Multiply, 100%. Go to the second texture and with the magic wand, click right outside the white "box." That way it'll be easier for you to get your picture cut into the white "box." Go back to this picture and click on the layer mask button located at the bottom of the layers box (on the right.) You may have to invert the mask (ctrl+I) Clean up whatever you don't like.

                                8) Open these three textures (1, 2, 3) and place them in the document. Organize them from top to bottom on the left side of the white "box," place them in whatever order you like and make sure they are lined up.

                                9) Duplicate those three textures and flip horizontal, then rotate 90 degrees. Move to the bottom right of the white "box" and skew the left side upwards a little to align the edges with the white box.

                                10) Open another pic of your character, one that has writing of some kind or maybe the title of the movie or tv show, etc. they are working in, and duplicate the layer. Hide the duplicate layer for now and give the other layer a layer mask. Erase EVERYTHING but the words/writing and set the layer to Soft Light, 100%. Un-hide the duplicated layer and use the same Gaussian Blur on it, Blur it out. Layer mask and erase where the words/writing is so that the words/writing can come through. Set this layer to Soft Light, 100%.

                                11) COLORING:
                                - Curves: Increase Contrast (RGB)
                                - Gradient Map: (I lost the urls where I got the Washed Away Art Gradients so until I find them again here are the colors: ) bd8a39 to 510600. Set to Soft Light, 50%.
                                - Gradient Map: 1a3da2 to fbf49c set to Soft Light, 100%.
                                - Pattern Fill: Use Pattern 23 from this pack and set to Soft Light, 100%.

                                12) I didn't like how light certain areas got so I created a blank layer and set the layer to Soft Light, 100%. I used my favorite blending brush, Talei-stock's Grunge brushes 2, and with black, darken the areas that you want darkened.

                                13) TEXT:
                                - Rick Castle: Jellyka's King's Hat, 60 pt. Fill, 0%. Blending Options: Drop Shadow: Default, Bevel and Emboss: Default except Style is Pillow Emboss, Color Overlay: 521441, Normal, 30%, Gradient Overlay: 2d2b30 to 5c7594 rest default.
                                -Warp text: Bulge: Horizontal, +27, -74, -82.
                                -Place in the main picture area.

                                14) Create a stamp of everything and use whatever filters you use to finalize your art. I used Topaz Clean, Crispstyle (default) and Paint Daubs to finalize my wallpaper.

                                15) Watermark your work, if you do, and you are finished!


                                If you have any questions, feel free to ask. I also posted this tutorial in my blog and on livejournal, both have images for almost every step so if you wish to go there, you may
                                Yep, I wanted to ask you, where to put my FB in . Na, just kidding, I hope I will find tomorrow a little time to read it completely. Thanks for sharing

                                Original eBook:Der Spuk im Rosenhaus
                                Sig & Avi by Josi
                                sigpic
                                LJ, FanFic-Blog(the longest lasting German SG-fanfic series), Profile at ff.net, Profile at FF.de,Profile at deviantART (Sorry, fanfics mostly in German)
                                I'm on Twitter and on Facebook Tumblr and AO3

                                Comment

                                Working...
                                X