Announcement

Collapse
No announcement yet.

Artwork for All - challenges, graphics, tutorials

Collapse
X
 
  • Filter
  • Time
  • Show
Clear All
new posts

    Jumble, love the first Advent and the WooHoo one as well ... what a great start Can't wait to see the rest - I'll be the first to thank you for collecting these and posting each day (if it were me I'd forget at least one along the way I'm sure!). Wanted to green you but sadly I can't at the moment
    sigpic

    Comment


      Thanks everyone

      Sha, I nearly did forget yesterday

      Here is Day 2....

      Comment


        WooHoo Day 2 by Cags.....

        Comment


          Ooh, those are lovely too Jumble! Bay, your Christmas Jack has been awesome (anyone interested in seeing more lovely Jack Christmas goodness please go and visit the Team Flyboy Thread - we had some lovely contributions yesterday). And there's just something about a Christmas tree in the background
          sigpic

          Comment


            not sure if this is the right thread for it, but i found no specific one for fanarts/drawings or things like that.
            first a small montage made just with ms paint:
            bra'tac: "these... shuttles... they are a formidable craft?"

            endeavour from serpents lair, ori-ship from unending.

            an animation:
            http://guy-inkognito.deviantart.com/...a-uld-94226361
            pencil drawing, colorized and animated with ms paint and gif animator.

            and 2 drawings:
            http://guy-inkognito.deviantart.com/...a-uld-94136136

            http://guy-inkognito.deviantart.com/...ines-271870943

            maybe someone likes it.

            Comment


              Indeed they are All the Advents I've received so far are really lovely

              DON'T FORGET TO SEND ME YOUR CHALLENGE ENTRIES!
              YOU HAVE ABOUT FIVE HOURS

              Comment


                Originally posted by Jumble View Post
                Indeed they are All the Advents I've received so far are really lovely

                DON'T FORGET TO SEND ME YOUR CHALLENGE ENTRIES!
                YOU HAVE ABOUT FIVE HOURS
                Jumble, thank you for the reminder! Yesterday was incredibly busy.

                *runs off to send entries now*

                Comment


                  Thanks Sha... and I love that one by Cags too. The effect on the lights is pretty cool.
                  sigpic

                  Comment


                    Ooh, lovely stuff everyone! Haven't had any time to make anything this week, I'm afraid...
                    sigpic

                    Comment


                      Challenge Week 14

                      Imitation!

                      They say imitation is the sincerest form of flattery - so go flatter somebody by making a piece of artwork in their style You can flatter as many people as you like

                      Josiane

                      Estrela style


                      Blacky Kitten style


                      Sarai style


                      Jumble

                      Sarai style


                      Ladygris

                      Jumble style


                      Madness Reigns

                      Sarai style


                      Nolamom

                      Ladygris style


                      Rocket Scientist

                      Jumble style


                      Scifan

                      Josiane style


                      ShaViva

                      Rocket style


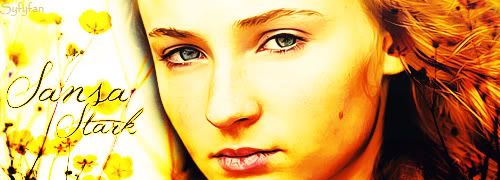
                      Syfyfan

                      Blacky Kitten style


                      Comment


                        TUTORIAL WEEK FOUR

                        This week is a Tutorial Week. For the first week every month, we don’t issue a challenge, but instead want to encourage thread participants to share their expertise and try something new, using tutorials. This is how it works:

                        1. Share a tutorial: Write a tutorial for a piece of art you have made recently, or post a piece of art you have made with the link to the tutorial you followed when you made it.

                        2. Follow a tutorial: Use one (or more) of the tutorials that other thread members have shared during the week to make a piece of art of your own.

                        The idea is that we should both teach something and learn something throughout the week It’s not obligatory to do both, if you’re limited for time, but we’d like to encourage you to please both share and follow at least one tutorial if at all possible. At the end of the week we will post all the tutorials along with any art made following each tutorial, so that we can see all the different interpretations all together.

                        We've put together some FAQs for you all which hopefully will clarify things and answer any questions you may have.

                        Spoiler:
                        FAQs: -

                        What if I don’t feel I have enough expertise to write a tutorial? Or I’m only a beginner, what can I teach anyone?

                        Everyone, no matter how long you’ve been artworking or what program you use, will know something that someone else doesn’t. There will be one function you’ve tried that other people haven’t even looked at, or one button you’ve pressed that no-one else has. And even if not, one of the most interesting things about tutorials is seeing how other people have done things. Of course, if you’re really a newbie at this, and haven’t made anything much at all yet, then don’t feel put off from participating just because you don’t have a tutorial to share. Try some of the tutorials other people share, and you never know, next month you might be able to write one of your own

                        - I’ve never written a tutorial before and don’t really know how. Any tips?

                        There’s no set way to write a tutorial. It can be as long or short as you like, complicated or straightforward, serious or light-hearted. If you’re not sure where to start, open up the .PSD or .XCF file (or equivalent) and then work your way through the layers - that’s usually a good way to remind yourself what you did at each point, even if when you did it originally you were just fiddling until you got something you like! And if all else fails and you have to just gloss over a step and say you’re not really sure quite how you did something at one point, don’t worry about it! There’ll be plenty of useful stuff in the rest of the tut regardless! If you’re still uncertain, wait a few days and get some tips from the tutorials other people share. Or just share a tutorial you followed that was written by someone else

                        - Do I have to follow a tutorial exactly, or can I use it as a starting point and then go my own way?

                        To meet the criteria for the challenge of the tutorial week, your art must have come from a tutorial posted during the week, but whether you follow the tutorial to the letter, or adapt it and go off on a tangent is entirely up to you!

                        - Anything else? When writing your tutorial, please include links to any textures/brushes you use, and


                        Pease specify which program you are writing the tutorial for, so that if anyone is using a different program they are aware that they may need to adapt it as they go along.

                        If you’re still uncertain, or have any other questions, please feel free to ask!

                        Please PM your entries (both your original tutorial and any art you make following a tutorial this week, together with a link to the tut you've used) to Sarai
                        Last edited by Jumble; 03 December 2011, 06:59 AM.

                        Comment


                          Very beautiful artwork everyone.
                          sigpic

                          Comment


                            *Headbutts thread......repeatedly* Forgot to send Jumble my entries. (my mind has been otherwise occupied over the past few days)

                            Lovely work every one.
                            sigpic
                            Thank you ladygris for my lovely sig and avi

                            Comment


                              Made a new sig and as it's tutorial week, thought I'd write a tut to go along with it


                              Made in Photoshop CS5.

                              Spoiler:

                              1. Crop your original image to sig size (I use 600x180).

                              2. Duplicate this layer and set the top one to soft light at 100%.

                              3. New adjustment layer - levels. Change the values as follows:
                              - RGB: Input 60, 1.00, 235
                              - Red: Input 9, 1.14, 255
                              - Green: leave as is
                              - Blue: Input 6, 1.00, 255
                              This brings out the reddish/purpley tones and increases the contrast.

                              4. Make a stamp of all the layers and sharpen. Duplicate this layer and use the gaussian blur on the top one, then use a layer mask to erase the part over Amanda. I wanted her to be nice and sharp but the rest to be out of focus.

                              5. Add a new layer and fill with #c69c6d (pale brown), set to soft light at 100%. This takes out more of the blueish tones.

                              6. Duplicate this colour layer and set to multiply at 20%. Use a layer mask to erase all the parts of it around Amanda - I was using this layer to put a bit more warmth back in her skin tone, as it looked really white, but it's not really needed for the rest of the sig.

                              7. Add this texture on a new layer, set to screen at 50%. I really liked the lighting effect but not so much the colours, so change them using image > adjustments > hue/saturation. Change the hue to +100. Use the gaussian blur on this layer too to get rid of the lines in the texture.


                              8. Now the text, font Champagne & limousines, colour #ebe1d4. Amanda is 48pt and set to 30% opacity. Tapping is 14pt, with the character spacing adjusted to +750, opacity 100%.

                              9. Add a new layer and fill with #534741 (dark brownish grey). Use the rectangle select tool to select the middle of the sig, leaving a decently large border. It doesn't have to be too even - in fact, it's better if it isn't! Use the refine edge option with the following settings - radius 5, smooth 50, feather 20. This should make it a really gentle blend around the selection. Delete the inside so you're left with a soft dark border. Set this layer to color burn at 50%. This creates a vignette type edge to the image.

                              10. And finally, just to finish things off, add a new layer on top of the whole thing and fill with pale grey (#ebebeb), set to color burn at 100%. This is my favourite final trick, just brings the whole thing out beautifully.
                              sigpic
                              Artwork for All | Sig & avi by JadedWraith

                              Comment


                                Beautiful sig and tut, josi! I'll have to try that.

                                Speaking of tuts, here's my first entry this week. I used this tut by bailey1ak.


                                And a couple of my own compositions.


                                Comment

                                Working...
                                X