Announcement

Collapse
No announcement yet.

Artwork for All - challenges, graphics, tutorials

Collapse
X
 
  • Filter
  • Time
  • Show
Clear All
new posts

    Originally posted by josiane View Post
    Thanks guys


    Sure Though as I say, I cheated a little and used actions, which kind of do the colouring for you The rest was just composition and fiddling to get the polaroid frames round the pictures nicely. But I'll see what I can do
    I downloaded that file you linked for ps, but I haven't got a clue what to do with it. A tutorial would be great. That is a spectacular wallpaper.
    sigpic

    Comment


      Originally posted by Nolamom View Post
      I downloaded that file you linked for ps, but I haven't got a clue what to do with it. A tutorial would be great. That is a spectacular wallpaper.
      Aw thanks And OK, tutorial coming up later I'll try to write it both for how to use the actions and also pointers in how to achieve a similar effect without them, if I can!
      sigpic
      Artwork for All | Sig & avi by JadedWraith

      Comment


        Fantastic! Thanks!

        Comment


          I'm loving this challenge for old movies...

          sigpic

          Comment


            Nola that's fantastic


            Nothing to do with the challenge, but thought I'd use some of my own textures for a change (and it seems like a while since I did any Carson art)


            And another self-made Texture that I used in it.

            sigpic
            Thank you ladygris for my lovely sig and avi

            Comment


              Mr, that's lovely! Both the texture AND the wallie!

              Comment


                I love it! I can't get over how you actually MAKE these textures - that is so amazing.

                thank you on the banner. There's a cyclone in the background, but after it was finished I realized that it wasn't very really visible.
                sigpic

                Comment


                  Thanks lg....

                  I really should try and concentrate on this weeks challenge, but I keep getting distracted by the Textures - I've made 6 today!!
                  sigpic
                  Thank you ladygris for my lovely sig and avi

                  Comment


                    Originally posted by Madness reigns View Post
                    Thanks lg....

                    I really should try and concentrate on this weeks challenge, but I keep getting distracted by the Textures - I've made 6 today!!
                    Your textures are beautiful! I'm working on a team wallie, now. But I'll likely do something with that last texture you made here in a bit.

                    Comment


                      Originally posted by Nolamom View Post
                      I love it! I can't get over how you actually MAKE these textures - that is so amazing.

                      thank you on the banner. There's a cyclone in the background, but after it was finished I realized that it wasn't very really visible.

                      Thank you

                      They are not particularly difficult to do Nola, a combination of brushes, colorization, a little gradient occasionally and maybe some layers The hardest part is finding brushes that work!
                      Last edited by Madness reigns; 22 October 2011, 11:43 AM. Reason: How did I forget a WHOLE word!!!
                      sigpic
                      Thank you ladygris for my lovely sig and avi

                      Comment


                        I've just started experimenting with brushes. They're sure a lot of fun.
                        sigpic

                        Comment


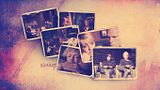
                          Okay, this is inspired by josi's wonderful wallie. I was impatient and inspired, so I just started gimping. It could tell a story, I suppose.

                          Comment


                            I love it lg, such lovely pics and the quote is perfect
                            sigpic
                            Thank you ladygris for my lovely sig and avi

                            Comment


                              Thank you, Mr. The quote just came to me as I was working on it.

                              Comment


                                Fantastic work, Nola, MR and lg!

                                As promised, tutorial for this wallpaper:


                                Spoiler:

                                1. First to make the background. Position the first texture on your canvas, filling it completely, and then add the second texture on a new layer above it, again filling the canvas completely, and set to soft light at 100%.


                                2. Next to add the polaroid pictures. Before you place each picture on the canvas, use the Earlybird action from the Instagram filters actions on it. If you can't use these actions (not sure whether they'll work in Gimp) or want to do it yourself (as I'm intending on learning how!), this is what the action does, as far as I can work it out:

                                Spoiler:

                                1. Add a new layer and fill with #fcf1d6. Set to multiply at 100%.
                                2. Duplicate your background and do the following adjustments (image > adjustments)
                                - hue/saturation: set saturation to -32 and lightness to 1
                                - levels: Move the middle arrow on input on the RGB arrows leftwards to 1.19. Then switch to 'red' and move the left hand arrow on the output to 27.
                                - brightness/contrast: set brightness to 15 and contrast to 36
                                - hue/saturation: set saturation to -17.
                                - levels (again): move the middle arrow on the input to 0.92 and the right hand arrow to 235.
                                3. Duplicate your colour layer from step one and select the entire layer with your select tool.
                                4. Edit > transform to about 90% of its size. Then refine the edge as follows:
                                - Radius: 6.9 px
                                - Feather: 250 px
                                - Contrast: 38%
                                - Shift edge: 15%
                                5. Keep the selection and make a new layer. Invert the selection and then fill with #b8b8b8. Set to color burn at 100%.
                                6. Duplicate this layer, but set this one to multiply at 100%.
                                7. Hide the copy of your first colour layer.

                                The difference is from this:


                                to this:


                                3. Place each picture on the canvas, then add this polaroid image on top, set to lighten 100%. Resize your picture underneath it so the right part shows up within the polaroid frame.


                                4. Remove the excess of your picture underneath the frame, as well as removing the outside of the frame (the white part). When you've done this, merge the polaroid layer down with your picture layer.

                                5. Repeat steps 3 and 4 for the rest of your pictures.

                                6. Arrange all the polaroid pictures on your canvas, rotating and resizing as you see fit. I wanted to create a bit of perspective so I made the polaroids progressively smaller as you went down the layers.

                                7. Add a new layer underneath all the polaroid layers but above the two texture layers for the background. Use the eyedropper tool to select a nice dark purple from the background, then use a large soft brush to create a bit of a shadow under the polaroids on the bottom and left. I didn't want it to be as neat as the drop shadow tool makes it, hence doing it this way. Reduce the opacity on this layer to 60% so it's nice and subtle.

                                8. Insert the quotes as text layers underneath the polaroid layers, using the same dark purple colour as for the shadow. The font is Signerica Medium. Set them to overlay at 100%.

                                9. Make a stamp of all the layers and sharpen.

                                10. Add the text for 'Always'. The font is Throw My Hands Up in the Air, and use the dark purple again. Set this to overlay too, and then duplicate it so that it's a bit stronger.

                                11. Finally, run the Nashville action from the Instagram actions set. Again, for those without the actions, this is what it does:

                                Spoiler:

                                1. Add a new layer and fill with #f7daae. Set to multiply at 100%.
                                2. Duplicate your background layer and do the following adjustments:
                                - Levels: Move the middle arrow on the input to 1.3 and the right hand arrow to 236. Then on the 'green' channel change the output values to be 37 on the left. Then on the blue channel, change the output on the left to 133.
                                - Brightness/contrast: set brightness to 6 and contrast to 51.
                                - Levels (again): change the input to 13 on the left on the green channel, and then make the input on the blue channel 88 on the left.
                                - Brightness/contrast (again): set the brightness to -6 and the contrast to 33.
                                - Levels (yet again): Change the output on the red channel to 4 on the left, and 14 on the output on the left on the blue channel.

                                This changes it from this:


                                to this:


                                And that's it! Phew!
                                sigpic
                                Artwork for All | Sig & avi by JadedWraith

                                Comment

                                Working...
                                X