Announcement

Collapse
No announcement yet.

The secrets on how to make artwork of the Sam/Jack ship family thread

Collapse
X
 
  • Filter
  • Time
  • Show
Clear All
new posts

    Originally posted by Sarai View Post


    I've just looked and I believe you are right.

    I seriously could have sworn it was 23rd November .


    See I remember that it was December because I remember gloating at the fact I was on top of him on the woohoo birthday list and you giving me virtual evils for it.

    Awesome challenge entries everyone.
    sigpic

    Comment


      Hmmm. I'm not convinced - I genuinely think that it might have originally been 23rd November which may have then been corrected. But hey, it woodn't be the first time I've been wrong and certainly won't be the last .

      In any case, what is the protocol for these occasions.

      Oh Oma? Your Yoda-like presence is required

      Comment


        Originally posted by Sarai View Post
        Hmmm. I'm not convinced - I genuinely think that it might have originally been 23rd November which may have then been corrected. But hey, it woodn't be the first time I've been wrong and certainly won't be the last .

        In any case, what is the protocol for these occasions.

        Oh Oma? Your Yoda-like presence is required
        I've been trawling the internet, and everywhere I've seen his birthdate it's been December

        Comment


          Answers!

          Spoiler:

          1. hlndncr
          2. LJ
          3. Josiane
          4. Graceful Spirit
          5. Oma
          6. ClassicCouples
          7. Padme
          8. Sarai
          9. Aveo
          10.ClassicCouples


          You could always have this week as Dan's birthday week so it's ready for the 23rd Dec so it won't overlap with Christmasy things
          sigpicMy Fanfic

          Comment


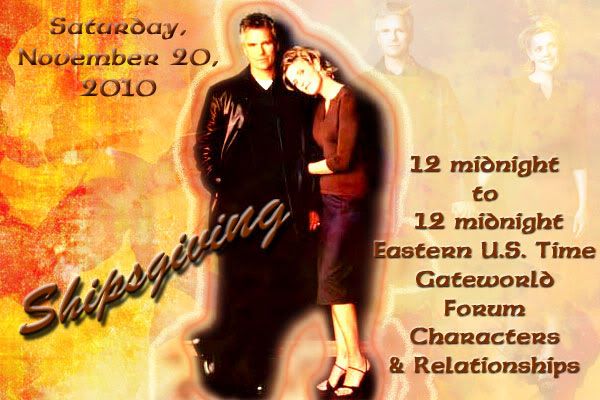
            Hello, all! Hope this finds everyone well.

            The holidays are rapidly approaching, which means celebrations are in store on Gateworld. Here's your official invitation to the first one (And please let hlndncr know what a great job she did on the art work!):

            The invite:


            The sig:


            The avatar:


            Please feel free to use the sig and avatar between now and the celebration!

            Hugs to all!

            Comment


              So, new challenge for this week.......

              *looks at Melissa's post*


              Vid by Chemmy

              Challenge Week 114 (again )

              from Oma

              Since some of us have moved on from S/J *glares at Jumble*, I'll not limit us to Shipsgiving, but lets have a Thanksgiving type theme It's always a good time to count your blessings, right?!

              Size: Any
              Pic: Any
              Text: Any
              Please PM your entries to Sarai


              Edit: Don't worry, I won't neglect Dan, I've snuck him in with another challenge
              sigpic

              Comment


                Originally posted by Oma-1 View Post
                You're welcome

                Of course, now I've gone and downloaded another 10 new fonts - I forced myself to stop there
                LOL! I love fonts too. I could use some new ones since I'm alway using the same ones. Care to share them? I went through all my fave fonts for this weeks challenge and couldn't find one I really liked.

                Originally posted by Oma-1 View Post
                So, new challenge for this week.......

                *looks at Melissa's post*


                http://www.youtube.com/watch?v=vpm3M...eature=channel
                Vid by Chemmy

                Challenge Week 114 (again )

                from Oma

                Since some of us have moved on from S/J *glares at Jumble*, I'll not limit us to Shipsgiving, but lets have a Thanksgiving type theme It's always a good time to count your blessings, right?!

                Size: Any
                Pic: Any
                Text: Any
                Please PM your entries to Sarai


                Edit: Don't worry, I won't neglect Dan, I've snuck him in with another challenge
                Oh Thanksgivingy! Perfect. I think I can come up with something for this.
                Icon by AceofHadeon Sig by TrueRomantic

                sigpic

                Comment


                  Okay, now that everyone knows who did which WPs (great work everyone) Aveo asked if I would post the tut for the text-in-text that I used in this WP:


                  There are more colors available @ my LJ

                  Spoiler:
                  1. Using the “Type Tool”, type the text that you want to use (it is best to use a font that is thick, that way you can fit more text into it). Also, select font type and size.

                  2. Create a path from the text. When you create a path, you can only do one letter at time (or at least that is all I know how to do). Select your text layer and with the “Type Tool” selected right click on your text (do not left-click first) and click on
                  “Create Work Path”.

                  3. On your layers tab, hide the text layer (click the eyeball next to the layer) and you will see the text path outline.

                  4. To make sure that your text fills as much of the space as possible, you will need to justify the path. This option is not available right on the toolbar, but if you click on the “Character and Paragraph” toggle, located at the end of the text toolbar, it will give you the option on the “character” tab > “Justify All”.

                  5. With the “Type Tool”, move your cursor over the text. You will see the curser change. Click inside the text. The font size will automatically be set to the same as the “outside” text, so you need to change it so that you can see your new text.

                  6. After the first letter, unhide the text that you hid in step 3 and right-click on your next letter and continue through steps 3-5 with each letter.

                  7. Once you have filled all of your text you can either leave it like that, or you can add a border around it.

                  8. To add a border, select the original text layer. Holding the Ctrl key, click on the white box next to the layer that has a “T”. This will select the outline of the text.

                  9. Go up to “Select” > Modify > Expand. A box will come up asking you how big you want to expand the text. For the wallpapers that I made, I expanded it “5”. Once you hit okay, your text selection with show the expansion. At this point, if the about isn’t to your liking, you can hit Ctrl+D, which will deselect the text and then you can start back at step 8.

                  10. Create a new layer once you have expanded the text.

                  11. Use the “Paint Bucket Tool” (first choose the color you want your border to be) to fill in the new layer. You should, at this point, have a bloated version of your text.

                  12. Hit Ctrl+D to deselect the layer.

                  13. With the new layer selected hold the Ctrl key and click on the white “T” box next to the layer of your original text.

                  14. At this point you should have your new text highlighted on the Layers Tab and there should be crawling ants around your original text. Now, hit delete on your keyboard. You won’t see any change until the next step.

                  15. At this point, you can either hide or delete the layer that has your original text. Once you have done that, the border can be seen.

                  16. Now, you can change the border color if you decide you want it a different color. Just hold the Ctrl key and click on the white “T” box next the border layer. Create a new layer and fill that new layer with the new color. Hold Ctrl+D to deselect the layer.

                  *Let me know if you need any clarifications*
                  Here are two other tutorials that may help:
                  Outline Text Effect :: This uses "Stroke" instead of "Modify" if you are more familiar with that.
                  Text Effect Tutorial :: This is pretty much exactly what I have above, but this tut has images.
                  sigpic
                  || acrazyobsession on AO3 & Tumblr || My DeviantArt ||

                  Comment


                    Don't you glare at me Oma! It's not my fault that I've been overwhelmed by the awesomeness that is Martin Wood!

                    And don't you forget, he IS an S/J shipper

                    Comment


                      Originally posted by Aveo_amacus View Post
                      Week 113 - sekrit challenge week

                      WP using lyrics from "She's just a Woman"
                      <snipped>

                      Beautiful challenge entries all!!


                      Originally posted by Oma-1 View Post
                      Egle asked for a tut of my current sig - it was so incredibly simple I feel like a fraud writing a tut for it

                      That's it. Simples!

                      Edit: Writing the tut, I just realised that I used lower case instead of caps, that's why the text didn't look how I expected
                      Originally posted by ClassicCouples View Post
                      Okay, now that everyone knows who did which WPs (great work everyone) Aveo asked if I would post the tut for the text-in-text that I used in this WP:
                      http://i189.photobucket.com/albums/z160/ClassicCouples/Stargate%20SG-1%20FanArt/th_samcarter_week113_14.png[/URL]
                      There are more colors available @ my LJ
                      Ooh, more tuts to play with

                      And I love the colour variations of your Sam WP CC
                      sigpic
                      Thanks to Jann (starlover) for the gorgeous sig!

                      Comment


                        Originally posted by Oma-1 View Post
                        Egle asked for a tut of my current sig - it was so incredibly simple I feel like a fraud writing a tut for it

                        Spoiler:
                        1. Start with this incredibly thunkable pic (which has such great texture it does all the work for you ) Resize and sharpen. (This is the bigger pic on the right)

                        2. Duplicate the layer, desaturate, set to Overlay at 75%.

                        3. Add in the original pic again, resize, place at the far left. Desaturate and sharpen.

                        4. Duplicate the layer, set to Overlay at 75%.

                        5. Transparent Layer - Use the vertical line select and stroke at 3px where the 2 pics meet, then use the rectangle select and stroke to make the border. Colour 000000. Set the layer to normal at 70%.

                        6. In a new layer add this texture. Place it on the right, then duplicate, flip horizontally, and match it up to the other half. Merge the two layers, set to Overlay at 100%.

                        7. Make a stamp of all the layers, set to Hard Light at 50%.

                        8. Add in the text. Font: Denial

                        9. Add a solid fill layer, colour 636262. Set to Lighten at 50%.

                        That's it. Simples!

                        Edit: Writing the tut, I just realised that I used lower case instead of caps, that's why the text didn't look how I expected
                        Here's what I got from that ^^^ tut...


                        I somehow just couldn't bring myself to dumb down the colouring like Oma did

                        Comment


                          *sneaks in*

                          Great challenge entries, everyone!!! And awesome non-challenge stuff too! greened who coluld

                          We have 2 challenges next week? Which one i should add to the list... or both of them?

                          Weeee! Rick/Mac!!!! Oma, the letters for thunk warning must be larger!

                          And thanks for the tuts, Oma and CC!
                          Last edited by Blacky Kitten; 16 November 2010, 08:56 AM.
                          sigpic

                          Comment


                            Originally posted by Blacky Kitten View Post
                            *sneaks in*

                            Great challenge entries, everyone!!! And awesome non-challenge stuff too! greened who coluld

                            We have 2 challenges next week? Which one i should add to the list... or both of them?

                            Weeee! Rick/Mac!!!! Oma, the letters for thunk warning must be larger!

                            And thanks for the tuts, Oma and CC!
                            It's the Thanksgiving one this week Kitten. The one for Dan's birthday will be done later

                            Comment


                              Originally posted by Graceful Spirit View Post
                              Beautiful challenge entries all!!
                              Ooh, more tuts to play with And I love the colour variations of your Sam WP CC
                              I loved all the entries, too. And this was the first time that I have had to write out a long tut, so I hope it is understandable. And I love color, so I had to do some variations. Glad you liked!!
                              sigpic
                              || acrazyobsession on AO3 & Tumblr || My DeviantArt ||

                              Comment


                                Originally posted by jumble View Post
                                It's the Thanksgiving one this week Kitten. The one for Dan's birthday will be done later
                                Ah, thanks Jumble!
                                sigpic

                                Comment

                                Working...
                                X