Announcement

Collapse
No announcement yet.

Artwork for All - challenges, graphics, tutorials

Collapse
X
 
  • Filter
  • Time
  • Show
Clear All
new posts

    Thank you

    Comment


      Challenge entry:


      Comment


        I know it's early, but I'm going out later. If there are any more entries I'll edit them in later


        banner by Syfyfan

        Challenge 228

        Flowers

        Your challenge this week is to make artwork that somehow incorporates flowers.
        As always, how it does this is up to you

        Samantha-Carter-is-my-muse


        Jumble


        Josiane


        Last edited by Jumble; 26 May 2017, 11:15 AM.

        Comment


          CHALLENGE WEEK 229

          HOT!

          Your challenge this week is to create a piece of artwork showing any interpretation of HOT!

          PLEASE SEND YOUR ENTRIES TO SARAI BY 5PM UK TIME ON FRIDAY

          Please remember to put your name or initials in the filename or on your piece.

          Comment


            Curses, and there was me thinking I was just going to sneak in before the deadline

            (RL still pretty frantic but I had a day off today in lieu of the bank holiday so finally got some PS time )

            Also just finished binge-watching this...

            sigpic
            Artwork for All | Sig & avi by JadedWraith

            Comment


              Edited

              Comment


                I've been resisting for years but I decide to try Topaz clean. The advantage is that everything looks very smooth....and the down side is exactly the same. So I am trying not to over do it and make it look very artificial.

                Well, you'll be the judge.


                ( this is a thumbnail-click to see it full size).
                Last edited by JadedWraith; 31 May 2017, 12:10 PM.
                sigpic
                Beautiful signature and avatar by Yamiinsane. You're a mind reader!
                Aristides de Sousa Mendes

                Comment


                  Lovely, JW!
                  sigpic

                  Comment


                    Originally posted by JadedWraith View Post
                    I've been resisting for years but I decide to try Topaz clean. The advantage is that everything looks very smooth....and the down side is exactly the same. So I am trying not to over do it and make it look very artificial.

                    Well, you'll be the judge.

                    https://t.imgbox.com/8hdIpRLR.jpg

                    ( this is a thumbnail-click to see it full size).
                    I did not know what Topaz clean was until I googled it I think it looks great, JW!

                    Comment


                      Originally posted by Samantha-Carter-is-my-muse View Post
                      I did not know what Topaz clean was until I googled it I think it looks great, JW!
                      It's a a set of filters designed to smooth out surfaces in photos. It was all the rage a few years ago in graphics and I didn't like the look because it made everything look slightly cartoony. But some people can really rock the style (yamiinsane comes to mind!) I am still trying to find the settings which gets me smooth surface but still make the image look "normal". Not there yet.
                      sigpic
                      Beautiful signature and avatar by Yamiinsane. You're a mind reader!
                      Aristides de Sousa Mendes

                      Comment


                        Nice work, Jaded I tried it out at one point too but could never get it to look right. I don't think I have the right style for it, really, and I know what you mean that some people overdo it and it gets cartoony if you're not careful. But I think you've hit it pretty well there, well done!
                        sigpic
                        Artwork for All | Sig & avi by JadedWraith

                        Comment


                          Banner by Syfyfan

                          Challenge Week 229
                          HOT!


                          slizzie1986


                          JadedWraith

                          Comment


                            Banner by Yamiinsane

                            Tutorial Week 65


                            This week is a Tutorial Week. For the first week every month, we don’t issue a challenge, but instead want to encourage thread participants to share their expertise and try something new, using tutorials.

                            This is how it works:

                            1. Share a tutorial: Write a tutorial for a piece of art you have made recently, or post a piece of art you have made with the link to the tutorial you followed when you made it.

                            2. Follow a tutorial: Use one (or more) of the tutorials that other thread members have shared during the week to make a piece of art of your own.

                            The idea is that we should both teach something and learn something throughout the week It’s not obligatory to do both, if you’re limited for time, but we’d like to encourage you to please both share and follow at least one tutorial if at all possible.
                            At the end of the week we will post all the tutorials along with any art made following each tutorial, so that we can see all the different interpretations all together.

                            Please PM your entries (both your original tutorial and any art you make following a tutorial this week) by 5pm Friday (UK time) to JadedWraith

                            Comment


                              I made this


                              based on this tutorial by Highwater

                              Edit: I reentered the link
                              Last edited by JadedWraith; 06 June 2017, 08:58 AM.
                              sigpic
                              Beautiful signature and avatar by Yamiinsane. You're a mind reader!
                              Aristides de Sousa Mendes

                              Comment


                                That's lovely, Jaded!

                                I was going to do a tut for this one last time round but RL got in the way, so have it now!


                                Spoiler:

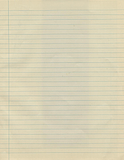
                                1. Open a new canvas and first fill it with this lined paper texture. Adjust the size and dimensions so that it fills the canvas completely.


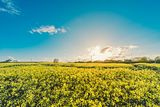
                                2. Next add this picture, positioned so that only the top half is used with the lovely sky gradient. Set it to soft light.


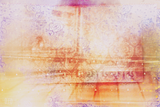
                                3. Next add this texture, again resized to fill the canvas completely, and set to hard light.


                                4. Now add your main character picture, set to hard light, and use a layer mask to blend it in.

                                5. Duplicate this layer and set the top one to soft light.

                                6. Add the secondary character picture, also set to hard light, and again blend in using a layer mask.

                                7. Now go back to your lined paper layer, use the eye dropper to pick the matching colour (#dad3ba), and using a big soft brush, paint underneath your character pictures to get rid of any lines showing through, particularly under the face.

                                8. Now three more textures all set to lighten - position them around the edges of your main character pic so that the light coloured bits help to blend its edges - this is a great tip if you struggle with blending smoothly, just cover up any dodgy edges with textures/light splodges!


                                9. Finally add this texture, set to overlay, and use a layer mask with a really big soft brush to delete most of it so you just get the punctured edge bit showing.


                                10. Now the composition is done, some colouring. First a selective color layer with the following settings:
                                - Yellows: C 0, M 0, Y -45, B -30
                                This takes some of the harsh yellows out.

                                11. Next a color balance layer:
                                - Shadows: C-R +20, M-G 0, Y-B +25
                                This gives it some more purply tones.

                                12. Then make a stamp of the whole thing and set to multiply as 20%. This makes it look a bit less washed out.

                                13. Now the text. The Spanish lyrics are in Rough Typewriter, #0f0017, set to color burn at 70%. Santiago Cabrera is in Delicious SmallCaps and is two layers, slightly offset to create a slightly 3D effect. The bottom one is #1c1775 and the top one is #f16c68. I picked all the colours using the eye-dropper from various places on the canvas.

                                14. Finally make another stamp of the whole thing and use filter > paint daubs to sharpen. For this one, it oversharpened a bit on the character pics (it works better with some pics than others), so I erased those bits using a layer mask. And that's it!
                                sigpic
                                Artwork for All | Sig & avi by JadedWraith

                                Comment

                                Working...
                                X