Announcement

Collapse
No announcement yet.

Graphic Arts Tutorials, Textures, Resources Thread

Collapse
X
 
  • Filter
  • Time
  • Show
Clear All
new posts

    Graphic Arts Tutorials, Textures, Resources Thread

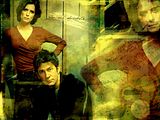
    Well, Kali1 asked me for a tutorial on my John and Weir Wallpaper and I've never done anything like that before. I tried to find a thread that has something to do with this but I couldn't find one. Since the Graphic/Wallpaper/Art display threads are in this forum, I thought this would be fitting for something like this.

    I know that I only started such arts 3 years ago and it was all due to my love and obsession to Stargate Atlantis and in particular the possibility and connection between Sheppard and Teyla. I started out with horrible works and I've moved myself to some okay works. So, we can all learn from one another and I believe in the power of practice, practice, practice...and with help, it can be taught, learned and even mastered!

    So, if you'd like to post a tutorial on your latest work, share your resources, or post your textures or any that you've found worth sharing, this is the thread for you.

    Let the fun begin!
    sigpic

    #2
    Okay, Kali1....a tutorial for me is going to be impossible because bottom line, I just work with things and move things around and when something looks good, I simply keep that way and move on to adding, deleting or whatever. I haven't gotten as savvy enough at this to actually be as disciplined to remembered the steps I took to create a piece of work and even less remember to be able to duplicate it! *pouts* sorry!!!!

    But, I do have and I think I remembered all the textures and caps that I used. I will try my best to explain the steps that I can recall as best as I can. But remember, no way will this work if you follow it step by step.

    Here are the final products:


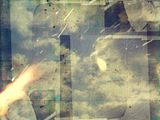
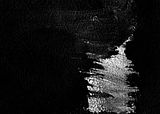
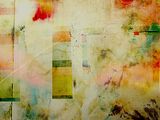
    First of all, I worked with these caps and textures.


    First, I start with the base, which is the EM Texture.

    Then I work with the cap by itself. I crop out Teyla, then bring the cap over to the base texture, it's actually much bigger so I play with the size, I erase any areas that I don't want and then I reduce the opacity by 20% to blend it and layer it. I actually copy and paste the original onto to the base texture and then do the steps above.

    Next, I align the cap to the corner and I play with it until I like it's position. I also make it darker and more intense by playing with the color adjustments.

    Next, I go back to the original cap of John and Weir and I copy and paste a new one to the base texture and this time I flip horizontally so that Weir is facing the opposite direction and I enlarge the cap and just let a side of her face show. I go back to the color adjustment and I make it transparent by 40%. I go back to the heart texure. I copy and paste it, reduce it and I move it so that it sits in the corner, covering a bit of John's hair on the right side and getting rid of him completely. I then go back and color adjust the picture and I also reduce it's transparancy by 50%.

    I take the last texture, New Image 2 with the scratches on it. I copy and paste it to the base and layer it. I reduce the opacity by 70% and I play with the color adjustment by intensifying its darkness and giving it a more softer and golden tones.

    Lastly, I play some more with the positions and the color adjustments. I erase what I don't want and I blend the layers more evenly. Once I am satisfied, I merge all the layers and then I color adjust once again to bring in that golden even tone to the entire wall. Once I'm happy, to make the banners, sig and icons, I simply crop to size and then I sharpen the image because when I change the size, it always makes the original blurry.

    gosh, I know this is a terrible tutorial, but at least you get the idea. With this wallpaper, I played around with it a lot back and forth cause I wasn't getting what I wanted. At the very least, you can play around with the textures and it can give you a better idea.

    I'll try my best next time to remember the steps. If anyone has an easy way to do this, please let me know.

    Thanks. And thank you for wanting me to do this for you kali. Eventhough, I'm not sure if this helped at all.

    Last edited by Jeyla4ever; 17 January 2009, 09:18 PM.
    sigpic

    Comment


      #3
      Oh I think that thread is a very great idea. It's pretty difficult sometimes to find the tuts I already did in the GAD, cause we're posting too much over there.

      And I think that tutorial is very well done. I'm pretty impressed how much you learned in that three years you're doing arts and how creative you are.

      I'm going to post a tut for my Pushing Daisies sig soon, cause lovely DJGirl asked for one.
      sigpic

      Comment


        #4
        Excellent! and thank you. So, there is another thread for this?

        Oh this is great, I can finally ask you tuts on your fantastic work to see if I can come close to using my CS3...*wink* I also like this idea because I remember when I started all the help and support I received. I couldn't have done it without that! Didn't matter the crap I threw at those girls in the Sheppard/Teyla thread, they still cheered me on and helped me along the way. That to me means everything and I love to see newcomers join and learn.
        sigpic

        Comment


          #5
          What a great idea for a thread! I am always looking for new tutorials to try. You tut looks pretty easy to follow, Camy. I am going to give it a whirl in a little while.
          sigpic
          Sig made by me

          Comment


            #6
            Great...*bites nails* Remember I should have mentioned that the software that I use is Photoimpact Pro 11 from Nova.
            sigpic

            Comment


              #7
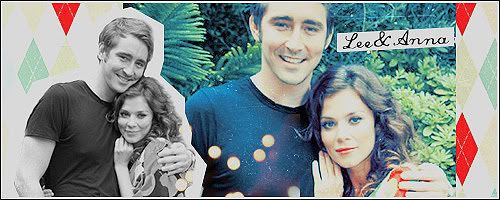
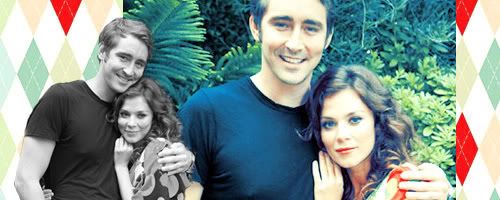
              Tutorial from Luci.

              How to do that sig:


              Lee pace "the pie maker" and Anna Friel "a girl named chuck".

              Spoiler:


              PIC1 ; PIC2


              Open a new document 500 x 200.
              You can also use any size you want.

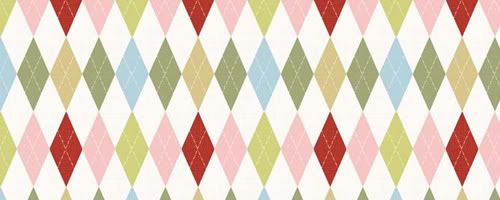
              I filled it with a pattern from far2far_away.
              You can use any pattern you want. But it should be simple, like plaid or stripes.


              PSP user just use my base. Created another one you can choose if you like.
              PS user can use them as well.

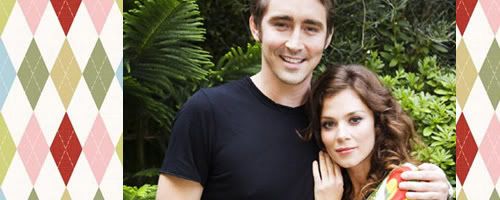
              Open pic 1 and put in onto the base. Not exactly in the middle...something like that:


              I erase a part of the right side to see more of the pattern.

              Merge layers.

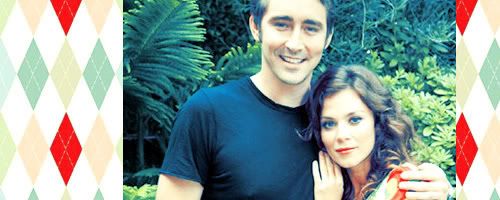
              Coloring

              Spoiler:


              PSP
              Spoiler:

              Here's coloring by helloimkelsey @LJ

              And here's one by everyline @LJ.


              It's a different coloring as I used for my Ned&Chuck sig...cause that one is easier and not that complicated.

              Copy base, set to screen 50%.

              New filllayer - solid color #FFFC00 soft light 70%.

              New adjusmestlayer -selective coloring:

              reds

              -100
              0
              +100
              +100

              yellows

              -7
              0
              -25
              0

              mangenta

              -100
              -55
              -11
              0

              neutrals

              +100
              -25
              -80
              +30

              OK

              Another selective coloring:

              reds:

              -100
              +71
              +64
              +34

              yellows

              0
              0
              -60
              0

              neutrals

              0
              0
              0
              +10

              black

              0
              0
              0
              +30

              OK.

              New adjustmentlayer - brightness/contrast: contrast +7

              New adjusmentlayer - hue/saturation: saturation +7

              Merge layers.


              Open pic 2. Desaturate it the way you prefer. Actually I prefer using black/white gradient maps, but it makes that pic just too dark.
              Resize it to about 265 x 400 and put in onto your document as well.

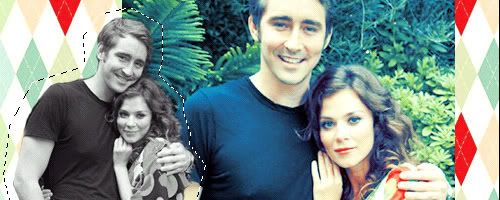
              Erase everything around them so that just Lee and Anna are left. Like this:


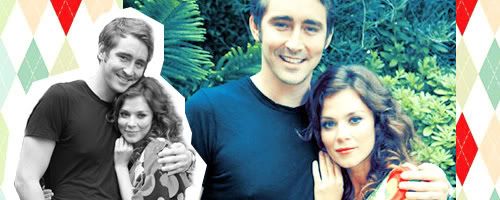
              Create a new layer underneath pic 2 and create a simple selection with the Polygon Lasso tool.


              Fill with white.


              Merge layers.

              Text and Effects

              Take that scratch texture, resize to 600 x 450 and put in on top of everything and set to color dodge.
              Erase everything from the faces and what looks bit disturbing.


              I wrote the names in commercial script 24pt and chose a color from the piece.
              Added a white rectangle behind the text to make it more visible.

              Merge layers.

              Put that light texture on top and set to lighten. I erased some of the parts on the right side.

              Edit > stroke > 3px white.
              Same again > 1px black.

              (I added a black/white gradient set to exclusion 15%.
              Still don't know if or how that works in psp. )

              Filter > artistic > paint daubs; set both settings to 1

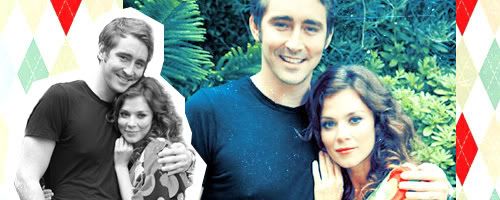
              And finished.


              Tried to keep it as simple as possible.
              Last edited by Luciana; 19 January 2009, 03:19 AM.
              sigpic

              Comment


                #8
                WOW...Luci....I Love it!
                Luci, when you save those piccies for your tutorial, do you save them and upload them like you would an artwork? And then write the steps?

                I have a new one of John from Vegas. Let me know if anyone is interested in the tutorial for that one. It was very simple and I wrote that some of the steps this time...*grin*
                sigpic

                Comment


                  #9
                  I do the art. Write the steps while I'm doing it and also save the steps.
                  Before posting the tut I upload all the pics I did for the tut, paste the text in first, followed by the pics.

                  I write something in the text for the pics... "Pic Step 1" for example or just how I called the pics...so I know which one to paste in later.
                  I hope I'm understandable.
                  sigpic

                  Comment


                    #11
                    What the...? Did you search the whole thread to find them all or did you bookmark them?

                    Thanks anyways...great to see them all here. *huggles*
                    sigpic

                    Comment


                      #12
                      Originally posted by Luciana View Post
                      What the...? Did you search the whole thread to find them all or did you bookmark them?

                      Thanks anyways...great to see them all here. *huggles*
                      I searched through the whole thread *cough*search function*cough*
                      What we do in life echoes in eternity - Gladiator vghUp the Blades!

                      Comment


                        #13
                        I tried the search function to find my John icon tut. I couldn't find it that way. or maybe I'm just too blind.

                        Thanks again.
                        sigpic

                        Comment


                          #14
                          Originally posted by Luciana View Post
                          I do the art. Write the steps while I'm doing it and also save the steps.
                          Before posting the tut I upload all the pics I did for the tut, paste the text in first, followed by the pics.

                          I write something in the text for the pics... "Pic Step 1" for example or just how I called the pics...so I know which one to paste in later.
                          I hope I'm understandable.
                          Perfectly...that's a lot of work, though...see, I go back and forth all the time and something might look good at first but when I try something else, I go back and forth constantly. I guess I just have to train myself better. Thank you.
                          sigpic

                          Comment


                            #15
                            Originally posted by CazzBlade View Post
                            Tutorials from the Graphic Art Display Thread:
                            Cazzie, you are AWESOME! this is perfect.
                            sigpic

                            Comment

                            Working...
                            X